Killing yeast is not easy

A few years ago, when we started our company I had a clear moment which worried me. I realized that our products may be shipped under difficult circumstances. My main concern was temperature. Most products will be safe but what about the yeasts? As far as I know they should be stored in a refrigerator. There probably is a reason for this. On the other hand; supermarkets don’t store the bread yeast cold. So how important is this?

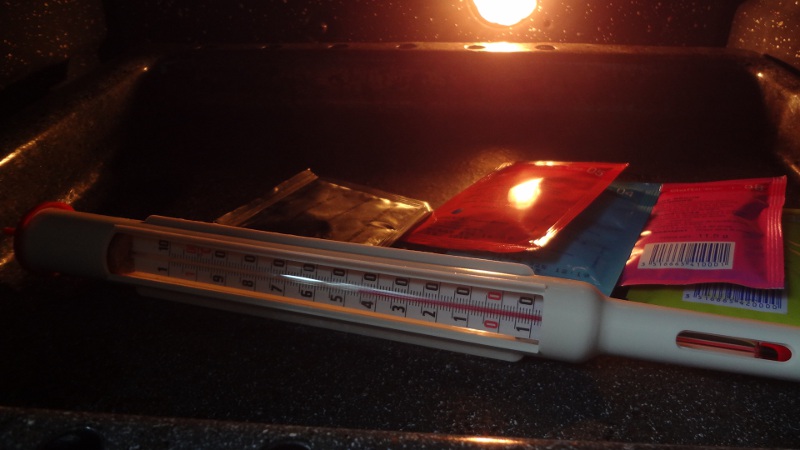
I decided to test the yeasts. It was a very simple test. I placed the bags of yeast in the oven and let them stay there for a week at 40 – 45 C. After that I checked whether the yeast were still alive.

I was not disappointed. The yeast was not affected at all. It worked perfectly and my mind found peace again.

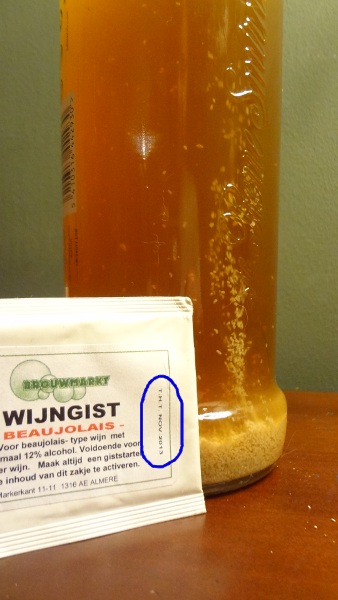
A few days ago I noticed that I had 2 very old packages of wine yeast. The expiration date is November 2013. Three years ago…. I estimate that the yeast must be 5 or 6 years old. Normally I would throw it away but I was curious. Would the yeast have survived?

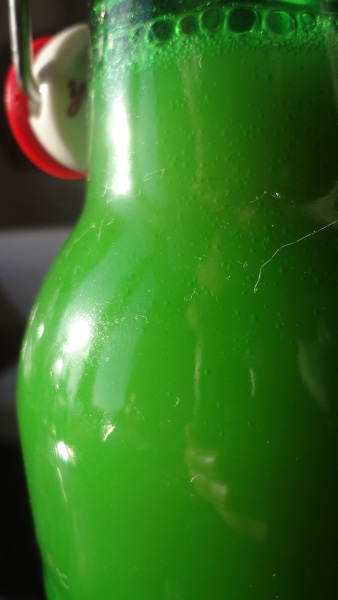
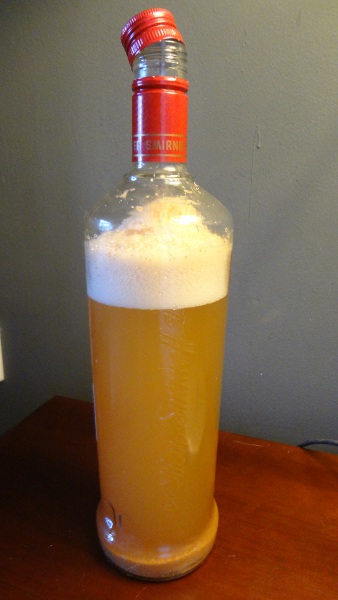
So I prepared a very simple starter. It is only apple juice in a clean bottle with the cap placed on top of it. (Not sealed of course) I was actually not surprised that after a few hours the fermentation clearly was underway. Again, I could not see any difference between this old yeast and a new package. I have another package that expired November 2013. Maybe I will test this again in 2020.

The juice is fermenting nicely and I am going to let it finish the job. See if it becomes a nice cider.

So if you have problems with a fermentation I would not blame the yeast. More likely the circumstances in which the yeast are put are too hostile. For example beers with a lot of alcohol may have trouble fermenting after bottling. If this is the case you can try to add champagne yeast which is very alcohol tolerant, give it a better chance with a starter, or in very serious cases you can try to restart the fermentation like this.

Cheers

Hans

Posted in Bira, Şarap | Yorumlar Kapalı

Don’t lose your head

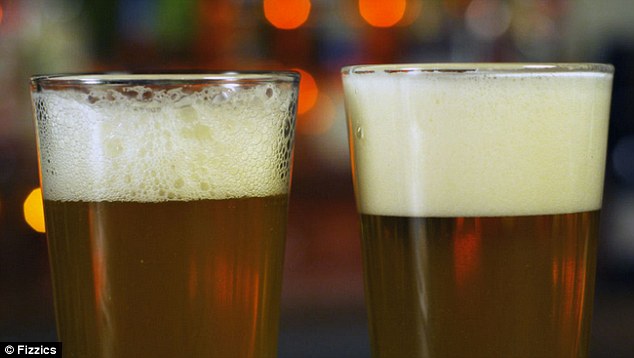
The most frustrating problem I had in beer making must be the head. I tried my best to copy a successful recipe as good as I possibly could and when the beer was finished I would be very disappointed by it. I would pour the beer in a glass and foam would appear. But then, the small bubbles would turn in big bubbles and within minutes they would collapse and the beer would look as if it had been standing there the whole evening. The soul had disappeared. In Dutch we literally call it “dead”.

I had no idea why it happened because I did everything according to the recipe. So It was time to find out what went wrong. And I found some information that was very helpful. I normally don’t like copying information without testing it but I think that the information I found was pretty good.

First of all I found that there are positive and negative influences on the head. And that the negative influences are much greater than the positive. For example: A perfect beer in a “dirty” glass will always result in disappointing foam.

So what happens when you pour a beer?

First foam forms. I guess that usually this is not a problem When there is CO2, bubbles appear and they drag beer up to form bubbles.

After that the beer drains down between the bubbles and the foam starts to dry.

Then the foam should be strong enough to remain. Some kind of structure should form to keep the bubbles small and strong. If there is something wrong the small bubbles will not be able to sustain themselves and collapse, forming bigger bubbles that will also collapse. It’s like watching your work being destroyed without being able to do anything about it. A dead beer is a sad, sad sight.

So what are the things that attack our beloved heads?

  • Higher alcohols. When we talk about alcohol we usually mean ethanol. Ethanol has 2 carbon atoms. Higher alcohols have 3 or more. A strong beer contains more higher alcohols and this has a negative affect on foam.
  • Esters. Esters are formed by acids and alcohols. Stronger beers contain more acids and alcohol and therefore again they have more problems with foam.
  • The biggest influence are lipids: Fats, oils, wax, sterols. Drinking a beer while eating cheese is killing the beer. The best advice is to clean your glass with hot water and rinse it thoroughly to get rid of soap residues.
  • Mashing. Malts of the past needed more steps in mashing. These steps were needed to break down proteine chains. If you do this with “modern” malts the proteine chains are broken down in small chains that cannot sustain foam. So it is advisable to start with a mashing temperature of at least 60 C. In case you use a high percentage of unmalted ingredients you may need to start mashing at a lower temperature.
  • Boiling too long causes alpha acids to be removed from hop. These acids are a positive factor in head retention. Boiling longer than 90 minutes should be avoided. For other reasons you should not boil less than 60 minutes.

And what can be done to improve our head?

  • Hops. Isomerized alpha acids have a positive effect on foam. So a beer with enough IBU’s has a better chance of a good head.
  • Malts. Cara malts contain longer proteins and do not contain enzymes anymore to break them down.
  • Racking. Remove the wort from the yeast after the first fermentation stage is finished. Dead yeast may fall apart and enzymes will form that break down the protein that are helpful for the head.
  • Fermentation temperature. Yeast is extremely important for your beer in more than 1 aspect so you should do your best to keep them happy. In the case of head retention it is advisable to ferment at temperatures that are not too high. Esters and high alcohols are formed and they are not good for your head. (High alcohols are really not good for YOUR head as well.)
  • Shake the bottled beers 2 weeks after bottling. I am not sure if it is a myth or truly helpful but the idea is that shaking the bottles dissolves the CO2 in the neck back in the beer.

I am merely an amateur and do not have the intellectual background to explain all the above. I doubt that there is any person on earth that possesses so much knowledge. I gathered these tips and translated them in “normal people language” because I found them helpful and I hope that it helps to give you a healthy head.

Cheers

Hans

Posted in Bira | Yorumlar Kapalı

Parsley wine

When I started making wine I read a lot about it. And I found recipes which I thought were really weird. People make wine from almost everything. I once even saw a recipe that contains chocolate! Since I was just trying to make a normal good wine I did not pay much attention to these crazy ideas.

However, one of them stuck and I wanted to try it for a long time: Parsley wine. Especially when I found out that parsley is apparently very healthy.

So I looked for a recipe and I found that there are 2 kinds. The first is very simple: Buy a bottle of white wine and add some parsley. If you want your wine to be healthier and tastier I think that this is a good option. If you are a wine maker you would choose for the second option: Create your own parsley wine!

There are plenty of recipes on the internet but I found that I did not have enough parsley in my garden so I made my own version. Here is my very simple recipe for 5 liters:

Ingredients:

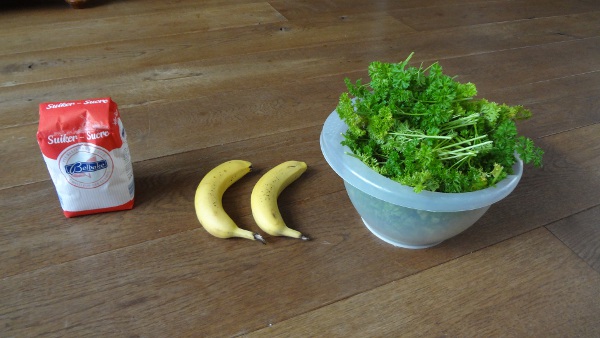
  • 310 gm Parsley
  • 2 bananas
  • 30 gm citric acid
  • 1 kg sugar
  • Wine yeast
  • Yeast nutrition 1 tsp

Method:

  • Mash the banana and put all the ingredients in a fermentation bucket
  • Add boiling water up to 5 liters
  • Stir to dissolve the sugar and let it cool down
  • Add yeast
  • After 3 days, rack into another bucket or demijohn.

The recipe was completely new to me but I had some ideas about it. It should be a light, fresh wine that perhaps could be drunk rather quick.

Some remarks:

It is rather safe to assume that there is not too much sugar in parsly. (Let’s say none.) 1 kg sugar in 5L gives you approximately 11 % alcohol. In the bananas is some sugar but that probably would not even produce 1% alcohol. Since some alcohol would evaporate in the demijohn I did not include the bananas in the calculation.

I assumed that there also would not be much acid (close to none) in parsly so I added 6 gm/L citric acid. Citric acid is stronger than tartaric acid so the acidity would be around 7.

The bananas serve 2 goals:

  • Yeast need food and probably they will not be able to get this from parsley.
  • A wine made only from herbs or flowers will not have much body. Bananas are great for body. No idea why, but bananas in wine is never a bad idea.

The result

After 6 months I tried a bottle and I was not sure about it. It looked great but it was a bit harsh and the aroma was a bit green, flowery. It was not ready and could be better in the future. At least that was what I hoped.

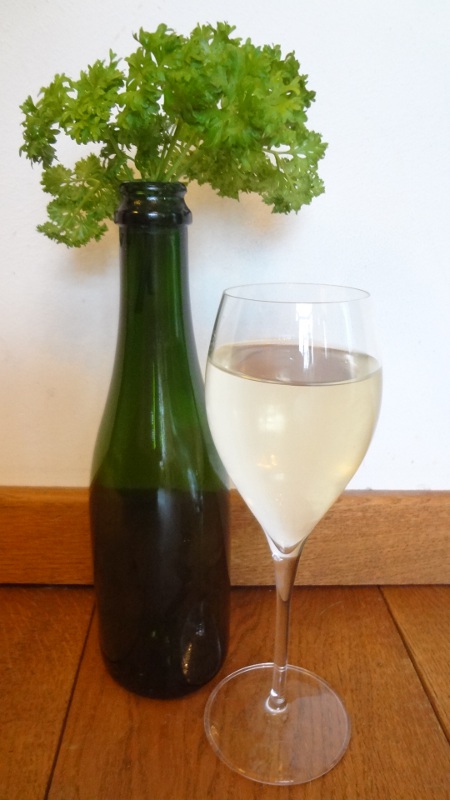
And luckily I was right. After 1 year it has become very nice. Of course it is not like a regular wine from the supermarket but it is not too weird. It is a very pale wine that has become very clear. It looks good. The combination of parsley and citric acid makes it very fresh. Maybe some people will find it too acidic.

The parsley creates an aroma of flowers and has a great impact on the taste. Recipes that I found on the web mention a lot more parsley but I think that you can also make this wine with only 250 gm for 5 liters.

In conclusion I would say that this was a very nice first attempt and I will definitely try it again. However I would change some details. I would use less parsley. I think that 250 gm would be enough for 5 liters wine. It tastes nice but it is not very subtle. I would also use a little less citric acid. Citric acid is the right choice but the combination with parsley gives the impression of a more acidic wine. Next time I will try 24 gm.

Cheers

Hans

Posted in Şarap | Yorumlar Kapalı

Pilsner; The experiment continued

With a great result I must add.

Some time ago I tried to make a pilsner without the proper equipment. I do not have a location to ferment at the proper low temperature and therefore it does not make sense to use a lager yeast. It would produce too many esters which does not fit a pilsner.

So I tried something else. I tried champagne yeast because it ferments very well in wines. The result was a nice beer but obviously not a pilsner.

So this time I decided to use a more normal yeast. In this case Fermentis US 05 because it does not produce a lot of esters and it ferments to a dry beer.

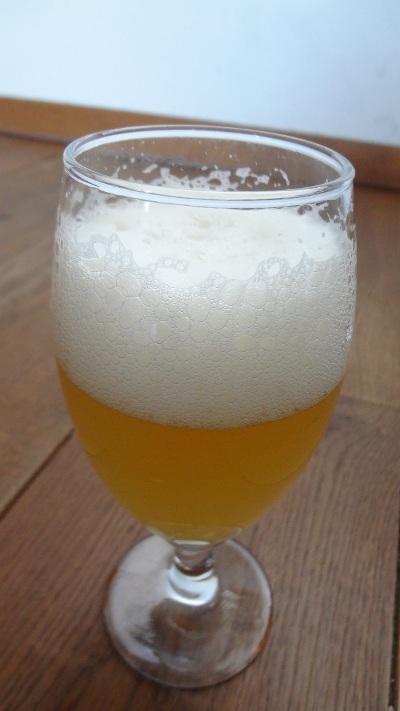
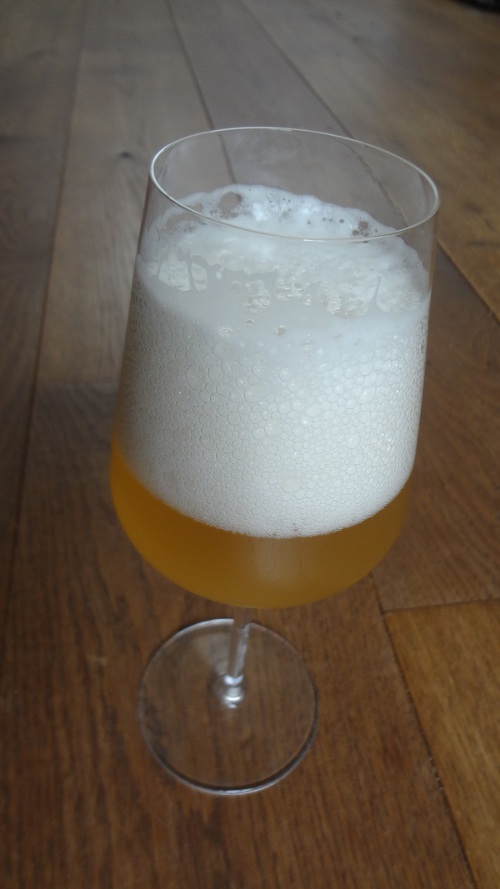
The result is great. The champagne pilsner was a funny experiment but this is much better. It has a nice light hoppy aroma. The bitterness suits the type of beer very well. Not too bitter but definitely there. There are no aroma’s from the yeast or esters. It is very neutral. Since the alcohol level is not too high it is a very drinkable beer. The head is very good and the head retention is better than all my previous beers. I am sure that I will make this beer again.

The drying foam is hanging on to the glass forever

The recipe is exactly the same as the previous experiment. The only difference is the yeast. And it is obvious that the yeast is of great importance.

So here is the recipe:

  • Amount 15L
  • Efficiency 68%
  • IBU 24
  • EBC 8
  • Starting SG 1047
  • End SG Oops. Forgot to measure
  • ABV 5,3%?

Ingredients

  • 3,5kg Pils malt 3 EBC
  • 11 g Brewers gold from Turkey 9,5% for 75 min
  • 4 g Aroma from Turkey 8 % just after boiling
  • 11 g Fermentis US 05
  • 2 g CaCl
  • 2 g Citric acid

Mashing

  • 62 C for 45 min, 72 C for 15 min, 78 C for 5 min.

Boiling time

  • 75 min

Priming sugar

  • 8 g/L

Remarks

  • No chilling after boiling.
  • Fermentation at room temperature

Probably this beer is somewhere in between a blond and pilsner. The bitterness is there, the hop aroma is there but not very outspoken. It is a nice simple very drinkable beer. The head retention is very good. I think that it is the best beer I made so far.

Cheers

Hans

Posted in Bira | Yorumlar Kapalı

Beer kits

Who could have thought that making beer at home could be so simple? It is as easy as making lemonade. After my disappointing experiences with wine kits I was reluctant to try a beer kit but the beers are really surprisingly nice.

Since I was making wine already I did not need to buy any equipment. The only thing I needed were empty beer bottles. The ones that I have are from Grolsch which have so called “flip top closures” so I don’t even need crown caps.

There are instructions in the package but I don’t need them anymore. Actually my eyes are not able to read the small letters anymore.

This is my personalized manual

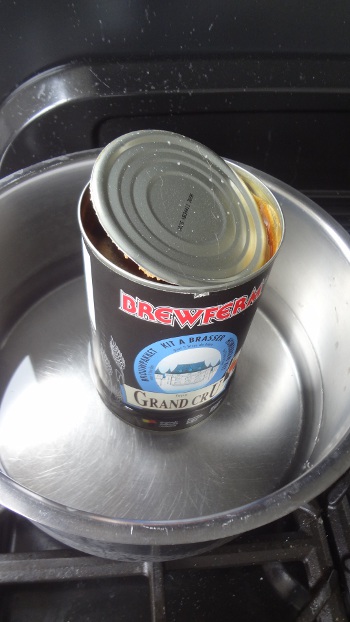
  • Open the can and place it in hot water. This way the syrup becomes more fluent.
  • Start boiling water. This is not strictly necessary but apparently boiling the water results in better foam on your beer.
  • Sterilize the fermenter and put in the syrup.
  • Rinse the can with hot water to get all the syrup out. Watch out, the can gets hot.
  • Add the sugar in the can and dissolve it in boiling water before adding it to the fermenter.
  • Sterilize a spoon (And your hands).
  • Add the proper amount of boiling water and stir. When a kit is meant for 9 liter I fill the fermenter up to maximum 9,5 liter. (During racking you will lose some beer.)
  • Close the fermenter and wait until the wort has cooled to room temperature.
  • Add the yeast. After a few hours you will see that the yeast starts working. Keep the fermenter in a room where the temperature does not fluctuate too much. Yeast doesn’t like that.
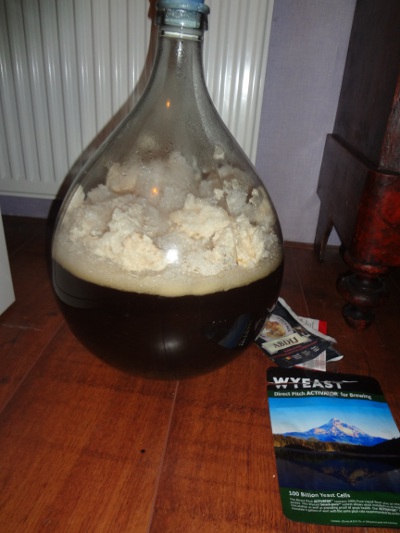
  • One day later you will see why you need a big fermenter. Lots of foam!

This is the nice thing of a demijohn. You can see what happens! This was an abbey kit with wyeast abbey yeast. I discovered later that the yeast was too expensive to use for one kit but look at that foam!

  • When the fermentation slows down I transfer the beer to a demijohn. This is not really necessary but I need the fermenter more often and it looks nicer in a demijohn.
  • After 2 weeks the fermentation is usually finished. You can check it with a hydrometer but I don’t do that anymore. When in doubt just wait a week longer.
  • Then it is bottling time.
  • Rinse the bottles with a sulphite and citric acid solution.
  • Put the bottling sugar in another demijohn and rack the beer in it. Do not disturb the lees. Make sure that the sugar is dissolved before bottling!
  • Rack the beer in the bottles with the bottle filler.
  • Store the beer in a room with constant room temperature and wait 6 to 8 weeks. Some beers will improve when you age them longer.

At the moment I do not make the kits anymore. Nowadays I am brewing beer the hard way. But at the time I was already thinking about some experiments with the kits. For example; using another yeast, adding some hops, substituting part of the sugar for honey, using another kind of sugar, add some extra sugar for more alcohol, etc. etc.. There are many things that you can do to create “your own beer” with a kit as a start point.

Cheers!

Hans

Posted in Bira | Yorumlar Kapalı

Black currant wine

When I started making wine my goal was to make a good red wine. I have no problem with white wine or rose but I prefer drinking red wine. I bought a few wine kits because I had no idea what I was doing. I did not like the results. It was wine, it was red, but in my opinion tasteless.

Since I have no grapes or other fresh fruit I started experimenting with juices that I bought from the supermarket. I was very happy with the resulting white wines but making red wines continued to be problematic.

I used many different red juices but in general they all have the same problems:

  • During the fermentation the color becomes lighter. In many cases it becomes a dark rose but definitely not red.
  • The acidity of the juices is too high. This does not suit red wine.
  • The resulting wines have no body.

So usually what you end up with is something that is more or less a rose with too much alcohol and a taste that resembles lemonade. Not bad as a rose most of the times but nothing like red wine.

Then I started experimenting with additional ingredients. I used for example oak chips, bananas, vanilla, dried elderberries, and tannin. Again the results were not good because I used too much. Vanilla is a great addition but it is very overpowering and red vanilla wine is not nice.

One juice became the exception: Black currant juice. I made red wine from it several times and it is pretty good. It can compete with the better supermarket wines.

So here is my recipe for 10 liter:

Ingredients:

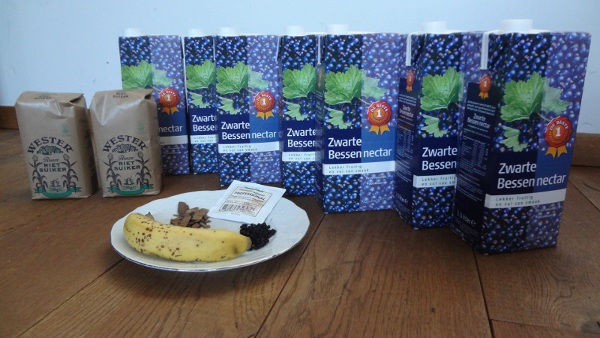
  • 10,5 liter black currant juice (This contains total 1260 g sugar according to the label)
  • 1 banana
  • 3 g red tannin
  • 4 g oak chips
  • 4 g dried elderberries
  • 1200 g cane sugar (Total 246 g/l which makes approximately 13% alcohol)
  • Yeast

Method:

  • Boil the sugar, oak chips, tannin, elderberries and mashed banana for a minute in some black currant juice.
  • Rehydrate the yeast in a little water.
  • Put the black currant juice in a fermentation bucket and add the boiled mixture. This way it cools down fast.
  • Add the yeast.

As you can see I did not measure anything. The amount of sugar in the juice is written on the package and I trust this. The acidity is probably a bit high so I will not add any. I am confident enough so I will not make a measurement.

The amounts of additions are very small. This is mainly because they all give a lot of flavor and the oak chips and elderberries also have tannin. You want them in your wine but not too much.

The banana is there to give the wine body.

I have made this wine before but I always try to experiment a little with additions. This is also the reason that I use cane sugar. I have not tried this before and we will see if this is an improvement or not.

Cheers

Hans

Posted in Şarap | Yorumlar Kapalı

Kill the bugs!

Cheese is a way to conserve milk. You add “good” bacteria to milk and they will eat all the nutrients so that “bad” bacteria cannot live in cheese. Therefore it is not really necessary to pasteurize milk. In general the rule is that a cheese is safe to eat after aging for 60 days. However, if you are not 100% sure about your milk you can pasteurize it as follows:

  • Heat the milk to 66 C. Stir the milk to prevent scorching.
  • Leave it for 30 minutes at this temperature.
  • Cool the milk as fast as you can. You can do this by putting it in ice water. If you add some salt to the water it will cool even faster.

This method is called LTLH or Low Temperature Long Hold. Another method is called HTSH or High Temperature Short Hold. The procedure is the same but in this case you heat the milk to 70-72 C and keep it at that temperature for 15 seconds.

According to the book from which I shamelessly copied this information, pasteurizing at the lower temperature is the best because some useful enzymes and bacteria can survive this procedure.

Boiled milk falls under the definition Ultra Pasteurized milk. Which is (as far as my knowledge goes) not the same as UHT because this has to be heated to 137 C.

I have never tried this and according to some websites it is not possible to make cheese from Ultra Pasteurized milk.

To make a not very long story even shorter; Don’t boil your milk.

Hans

Posted in Peynir | Yorumlar Kapalı

The devil is in the details

“Where people work, mistakes are being made.” This is a Dutch saying. As a matter of fact I use this whenever I make a mistake because the opposite is also true. “If you don’t work, you don’t make mistakes”. And I made a lot during the last 10 years.

As I said before; I share my mistakes so you don’t have to make them again.

Putting beer (Or champagne) in bottles.

The last step in making beer is putting it in bottles. It is my least favourite step because it looks a lot like working.

You can do this as follows:

  • Dissolve bottling sugar in water and add the right amount of the solution to each bottle and add the beer.
  • Add the right amount of sugar to each bottle and add the beer.
  • Add all the bottling sugar to another demijohn or bucket and rack the beer to that bucket. Then put it the beer in bottles.

The last option is my favourite because you don’t need to be very precise. Instead of measuring 2,64 gm per 0,33L bottle you can measure 120 gm per 15L. I also believe that is less work. I am not 100% sure of the last part because it requires one last racking extra.

So what I do is the following:

  • I clean a demijohn and add the bottling sugar. Usually about 8 g/L for beer (or 20 to 25 g/L for champagne.)
  • Rack the beer into this demijohn. Don’t worry too much about splashing and oxygen because you need oxygen to give life to your yeast again. Also don’t worry about racking some yeast. Your beer needs it. Try to get as much beer in this demijohn as possible. There is no need to to work extremely clean because new yeast will form in the bottles anyway.
  • Shake the demijohn until you are sure that all the sugar is dissolved in the beer. (For champagne this takes a bit longer because there is a lot more sugar to dissolve.)
  • Siphon the beer from the demijohn in the beer bottles. Get this tool if you don’t have it. It is worth its’ weight in gold!

So here comes the DOOOHH!! part. I made 2 huge mistakes in these simple steps.

  • I forgot to add the bottling sugar completely. I just racked the beer in another empty demijohn and into the beer bottles. After 1 month I found that there was no CO2 at all in the finished beer.
  • I added the bottling sugar to the demijohn but did not dissolve it properly in the beer. The result was that some bottles had very little CO2 in them but other bottles had very much and they created so much CO2 that you could barely taste the beer.

Learning all the time.

Cheers

Hans

Posted in Bira, Şarap | Yorumlar Kapalı

Champagne pilsner

This is an experiment. The goal of the experiment was to make a pilsner without the use of a refrigerator. Why? Well because I don’t have a suitable refrigerator and I am sure that lot’s of people like to make beer but don’t have the room for another piece of furniture.

My first thought went to using wine yeast. Wine yeast usually don’t create a lot of esters and ferment until the last grain of sugar is eaten. Unfortunately wine yeasts don’t flocculate as well as beer yeasts. Champagne yeast is the best among the wine yeasts in that aspect. It also is a very strong yeast that can tolerate high levels of alcohol.

However after some research I found that wine yeasts cannot handle the more complicated sugars in beer. Of course the internet is not a great help because I also found some sites that claim that wine champagne yeast can ferment beer to dryness. Great, all this “information”. What can you do?

I decided to try it. So I made a simple recipe for pilsner which I fermented with champagne yeast. I made some changes to improve my chances for success and suitable for my situation:

  • I used mash temperatures which started a bit lower so I would get more “simple” sugars.
  • Since I don’t have a refrigerator the fermentation was at room temperature.
  • I stopped chilling wort some time ago and did not see a reason to do this.
  • Since I like the Turkish hops I used them instead of the hops mentioned in the recipe.

The fermentation started like crazy and after 2 days it looked as if it was finished already. I always leave the demijohn in peace for at least 2 weeks and then I measured the gravity. The hydrometer stopped at 1020.

This was not great news. When you look at the table you can see that the residual sugar is 50 g/L. This is obviously very much and it means that only 3,5% alcohol had formed. After bottling this would total to approximately 3,9%.

I decided to continue and see what would happen. After a few weeks I tried the beer and it was very nice. It was not pilsner but much more like wheat beer. An aroma of bananas and a good body. Since the higher sugars don’t taste sweet it actually feels reasonably dry and fresh. The colour is rather light and it is cloudy. Probably because the champagne yeast cannot compete with beer yeasts in terms of flocculation. In a strange way you don’t have the feeling that there is only little alcohol in it. Perhaps the higher sugars also give an alcohol sensation. I should look into that.

Anyway, the recipe is as follows:

Goal (Or I should say: Unexpected result)

  • Amount 15L
  • Efficiency 68%
  • IBU 24
  • EBC 8
  • Starting SG 1047
  • End SG 1020
  • ABV 3,5%

Ingredients

  • 3,5kg Pils malt 3 EBC
  • 11 g Brewers gold from Turkey 9,5% for 75 min
  • 4 g Aroma from Turkey 8 % just after boiling
  • 11 g champagne yeast
  • 2 g CaCl
  • 2 g Citric acid

Mashing

  • 62 C for 45 min, 72 C for 15 min, 78 C for 5 min.

Boiling time

  • 75 min

Remarks

  • No chilling after boiling.

With all the modifications it is not a surprise that the beer did not turn out to be pilsner but some lessons were learned.

Champagne yeast can definitely be used in beer making. It does not create a lot of alcohol but still gives you a full bodied beer. I believe that it would be very suitable for a wheat beer.

Champagne yeast does not ferment all the sugars in beer. If you want a low alcohol beer because your friends cannot handle it, please start your own experiment.

Since this experiment is very drinkable I will start a new experiment very soon. That is what I love about making beer. It may not be what you aim for; It can still be very good!

Cheers

Hans

Posted in Bira | Yorumlar Kapalı

The Tsunami airlock

Fermentations can be deceiving. Look at the apple wine I tried to make yesterday. Fermentation would not start at all. I was lucky to get it going at all.

And see what happens next! When the fermentation finally started I was still a little worried because it remained a little slow. For that reason I decided to put it in the 15 liter demijohn and fill it up. Champagne yeast usually does not create a lot of foam so I did not expect problems.

Only a few hours later the weather changed dramatically. From a relaxed sunny day it turned into a hurricane. Fermentation became quite violent and I was afraid that the air lock would be filled with foam and eventually overflow and spill on the table.

A simple solution is to accept the fact that it overflows and place the demijohn in the shower so you can clean it easily. Perhaps your family will not think that this is a brilliant solution.

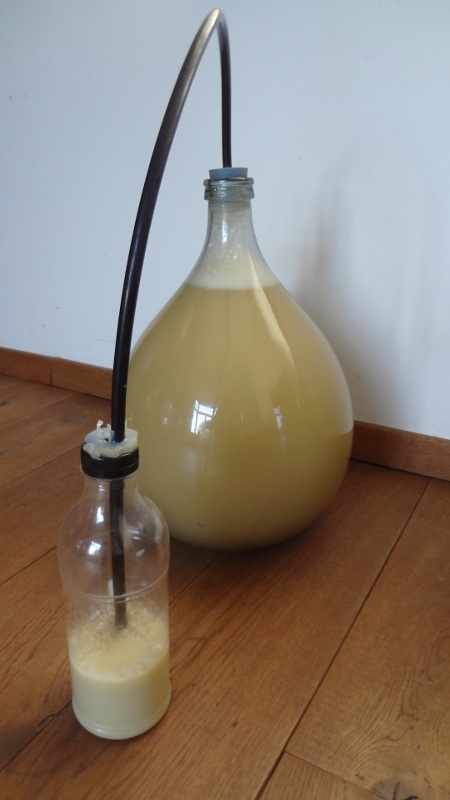
And they are right. A nicer solution is the Tsunami airlock. It obviously is not a high tech solution but it works good enough. And it is very easy to make.

  • Make two holes in the cap of a bottle.
  • Glue a tube in one of the holes. (The tube should fit in the hole for the air lock in the cap or bung.)
  • The end of the tube should be close to the bottom of the bottle.
  • Add water to the bottle so that the tube is in the water. (For security you can add some citric acid and sulphite to the water.)
  • Connect the tube to the demijohn.

Obviously it does not stop the foaming but the foam is collected in the bottle.

Please note that in extreme cases the bottle will be filled, so you still need to check it.

Cheers

Hans

Posted in Bira, Şarap | Yorumlar Kapalı