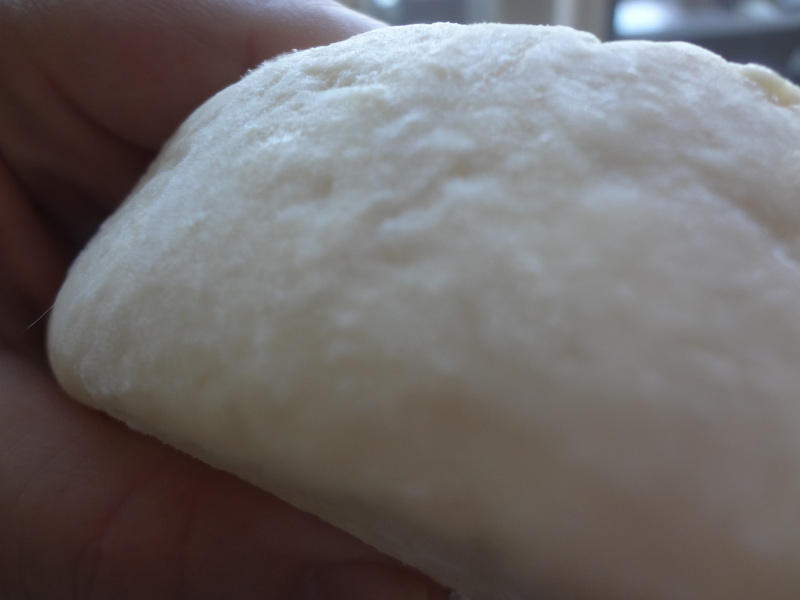
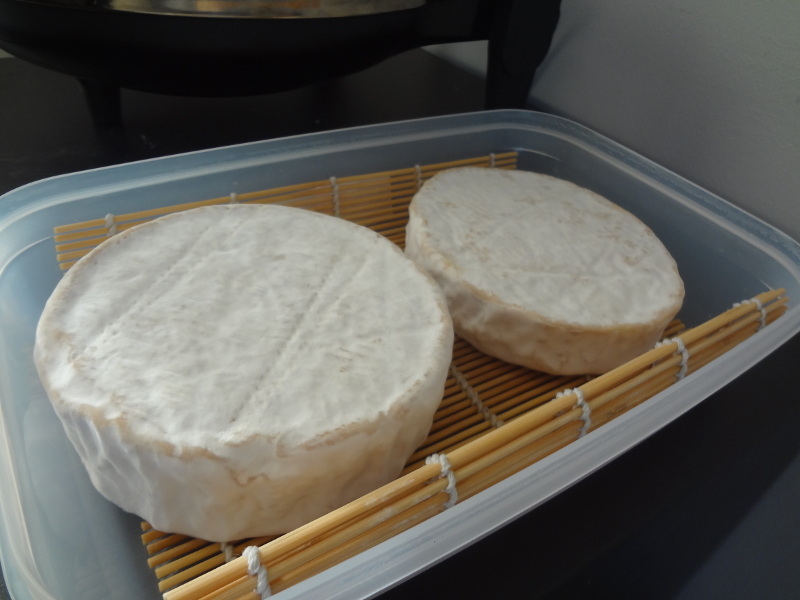
Leerdammer, the recipe

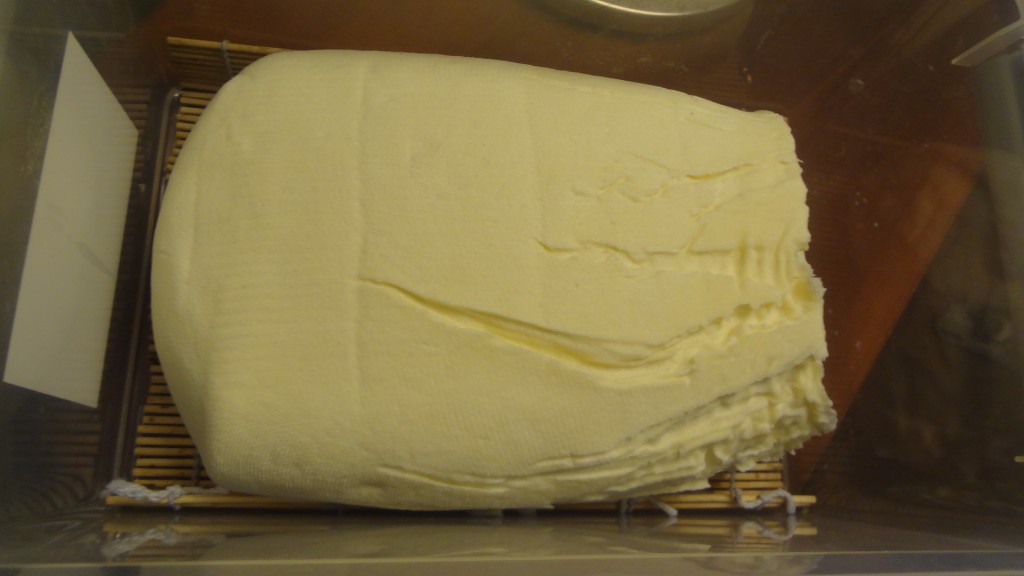
This is the recipe for the cheese from the post underneath. It is definitely one of my favorite cheeses. It has a very outspoken taste and it is finished relatively soon.

You can compare this cheese to its better known cousin Emmental. It is very similar but this version can be eaten young.

Here is the basic recipe which I more or less copied:

Ingredients:


Milk 14L
Partly skimmed milk 2L
Thermophylic culture 2,5mL
Propionic bacteria powder 1,25mL
Calcium chloride 3,75 mL
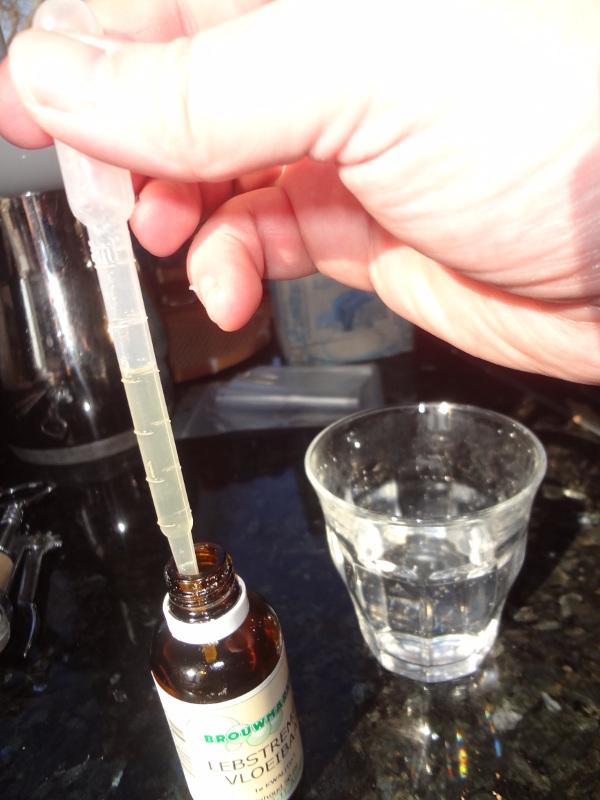
Liquid rennet 3,75 mL
18% Brine
Cheese wax

Recipe:


Warm milk to 31C
Mix culture and propionic bacteria in the milk
Wait 30 min.
Add Calcium Chloride
Add rennet Wait 40 min.
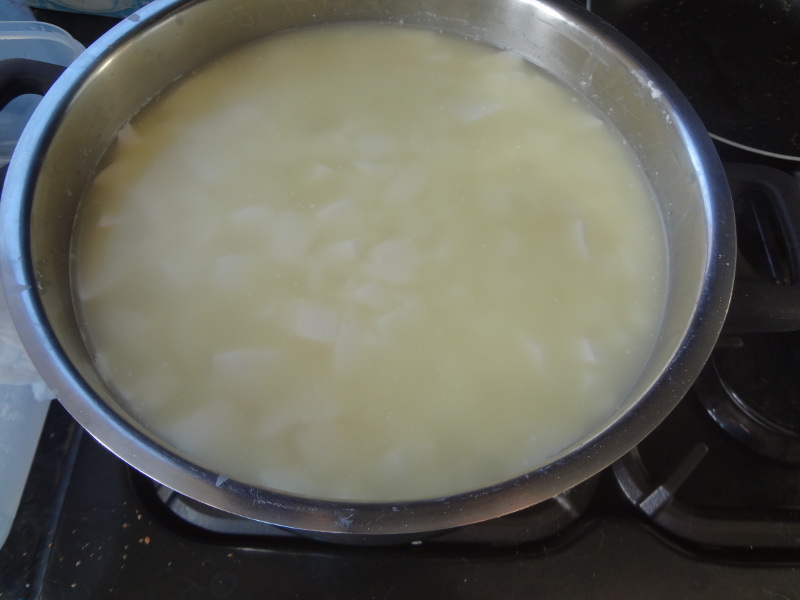
Check for a clean break and cut curds to pea size
Remove whey up to the surface of the curds
Add as much water (31C) as removed whey
Warm curds to 39C in 30 min. Do not heat too quick!
Wait 30 min. Stir curds.
Remove 750 mL of whey and replace with cold water until temperature reaches 36C
Wait 10 min.
Drain curds and fill mold.
Press at medium pressure for 4 hours
Place cheese in brine for 20 hours at 12C. Turn at 10 hours
Dry cheese at room temperature for 2 days
Use cheese coating and ripen at 4C for 2 weeks
Ripen for 4 weeks at 18C

Here are my alterations:
I make a smaller version so I only use 10 litres of milk (No skimmed milk at all)
I do not have thermophylic culture so I use 3 table spoons of Greek yoghurt instead.
I only use 2,3 mL rennet because of the smaller volume
I place the cheese in brine for only 9 ½ hours. I think this is very important because
propionic bacteria are not very resistant to salt!
I do not use Calcium Chloride because I have fresh cow milk.

In this case I did not use wax (Obviously) because at the moment I believe that the other bacteria benefit the cheese. I may change my mind later!

Hans

Posted in Peynir | Yorumlar Kapalı

The power of cheese

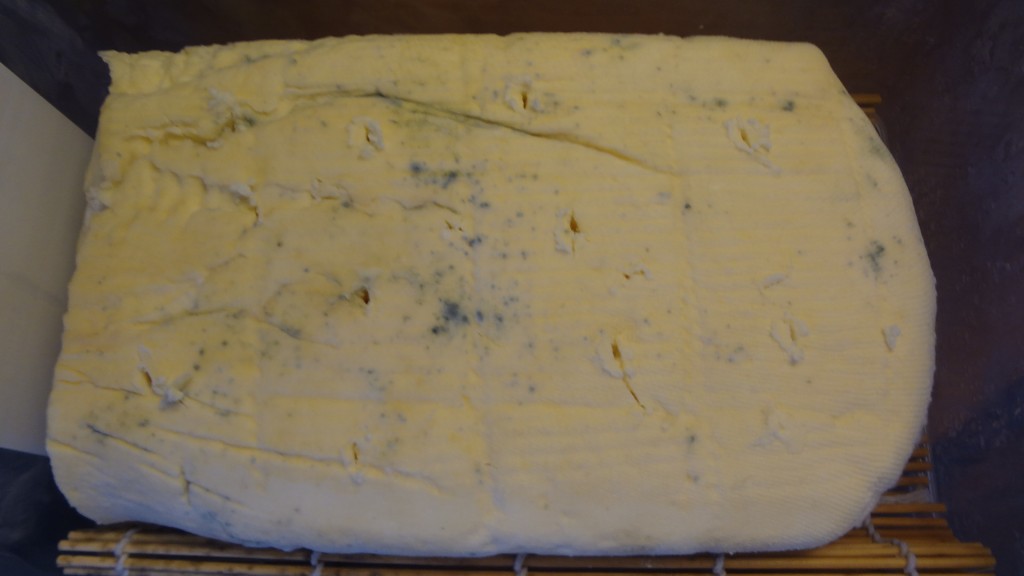
Some time ago I had to go to china for work. I was away for 10 days. A friend takes care of the cats but I also was making cheese at the same time. A Leerdammer.

Leerdammer ripens for a period of 4 weeks at a temperature of 18 C. This is quite warm and I guess this temperature helps the propionic bacteria to grow and multiply inside the cheese. Apparently this bacteria is not as strong as P. roquefortii or P. candidum so I guess it needs some help.

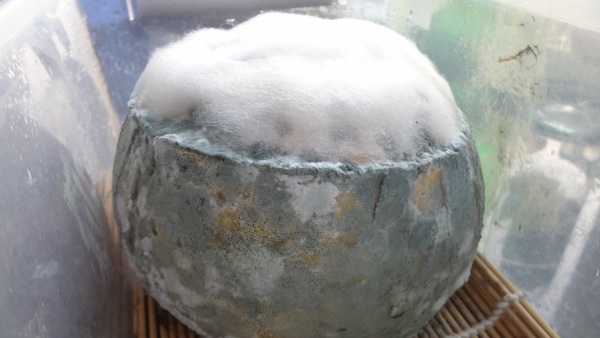
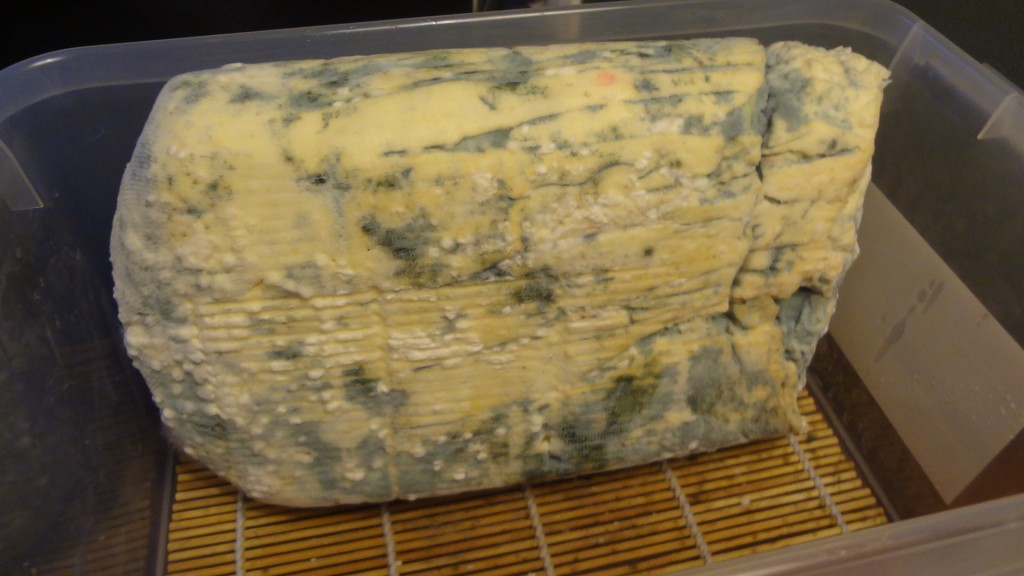
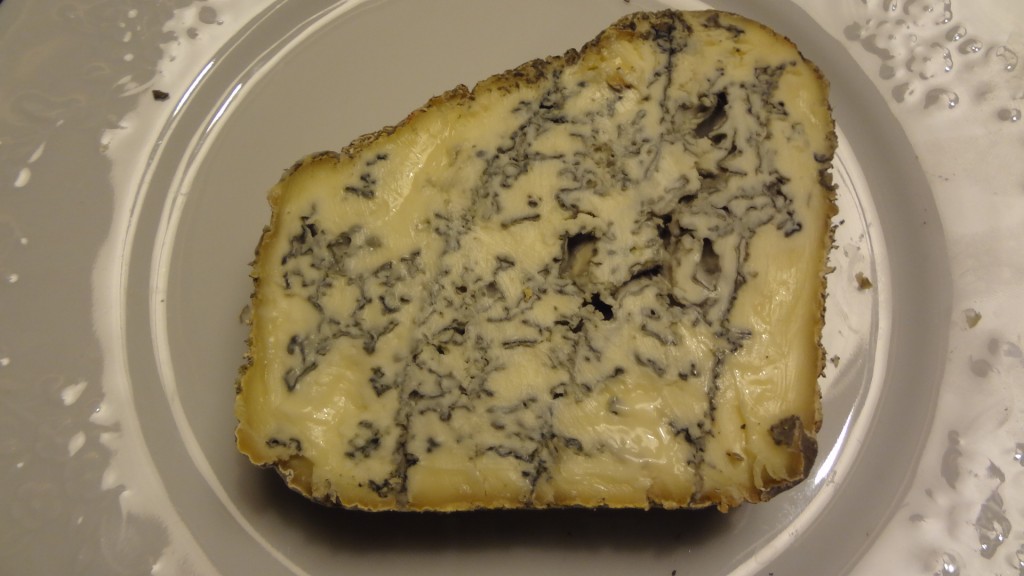
However this temperature not only helps propionic but it also helps the others.Resulting in this:

Yes it IS cheese! Isn’t it fantastic?

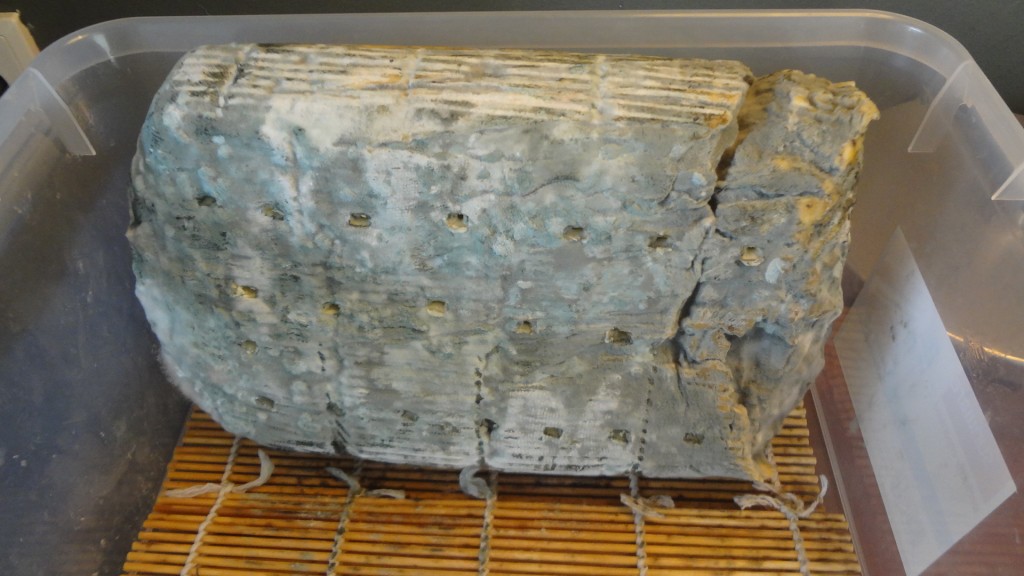
A work of art but quite disgusting to have in your refrigerator. It appears that every fungus or mold or whatever has found a home. I had no idea that it looked like this and asked my friend if she could turn the cheese while feeding the cats. She claims that she did….

This is not the first cheese that I made but I did not see anything like this before in my life. I stared at it as if you would stare at a car crash. Horrified but fascinated at the same time.

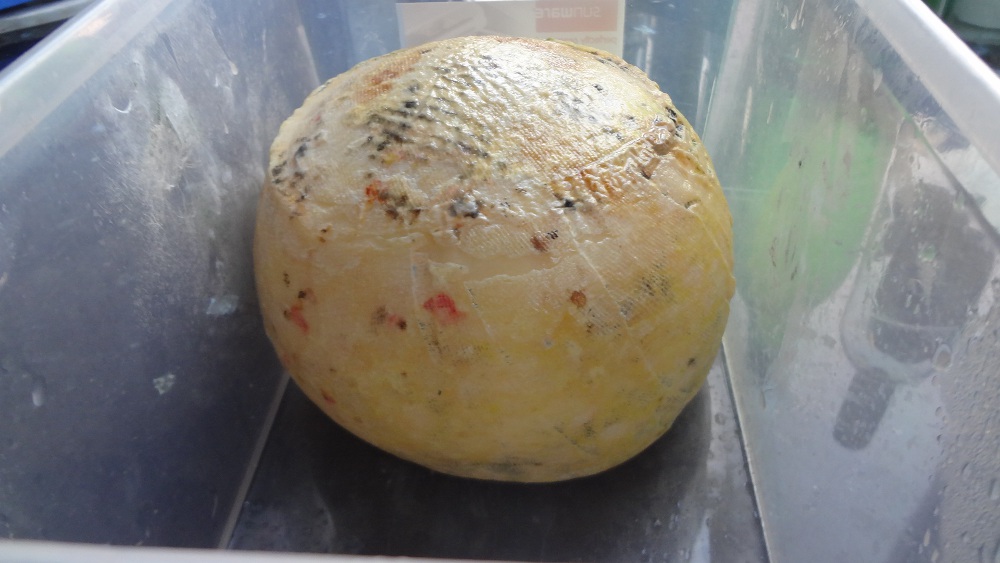
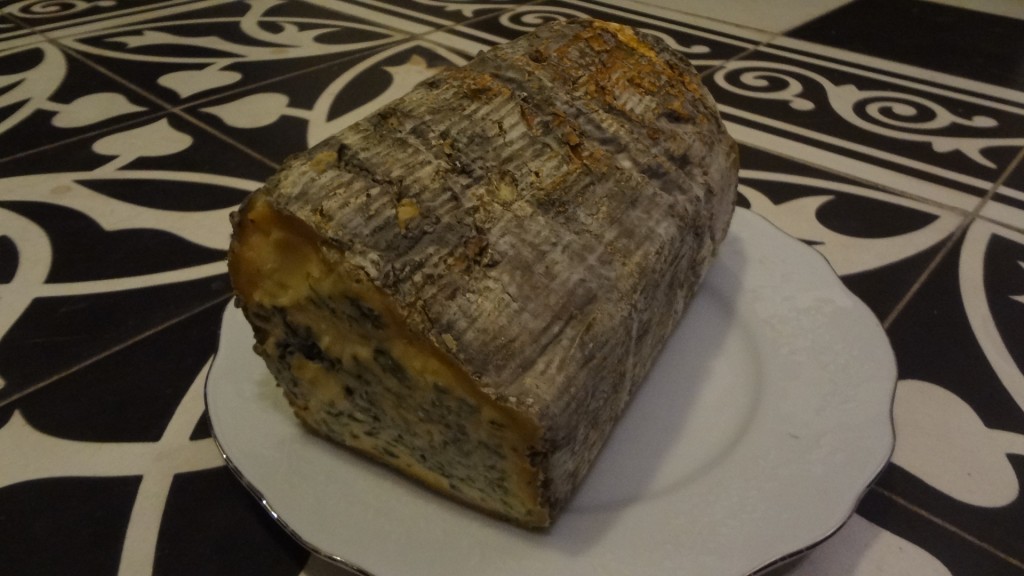
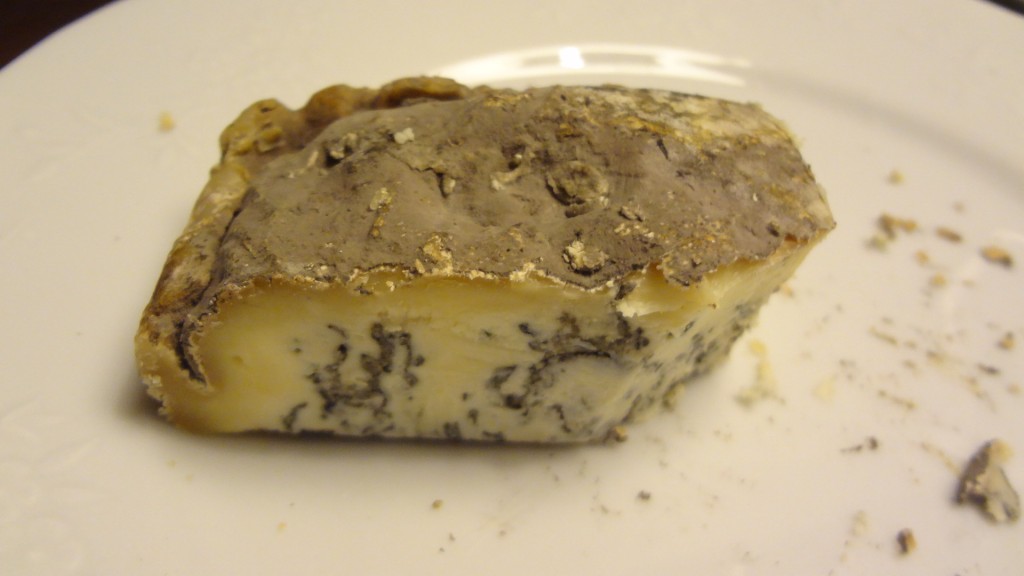
I picked it up and the blue fungus turned into a blue fog. It simply falls off like dust. I cleaned the cheese with a brush and water. After that I cleaned it with a salt and vinegar mix to kill all remaining bugs. And look at the result:

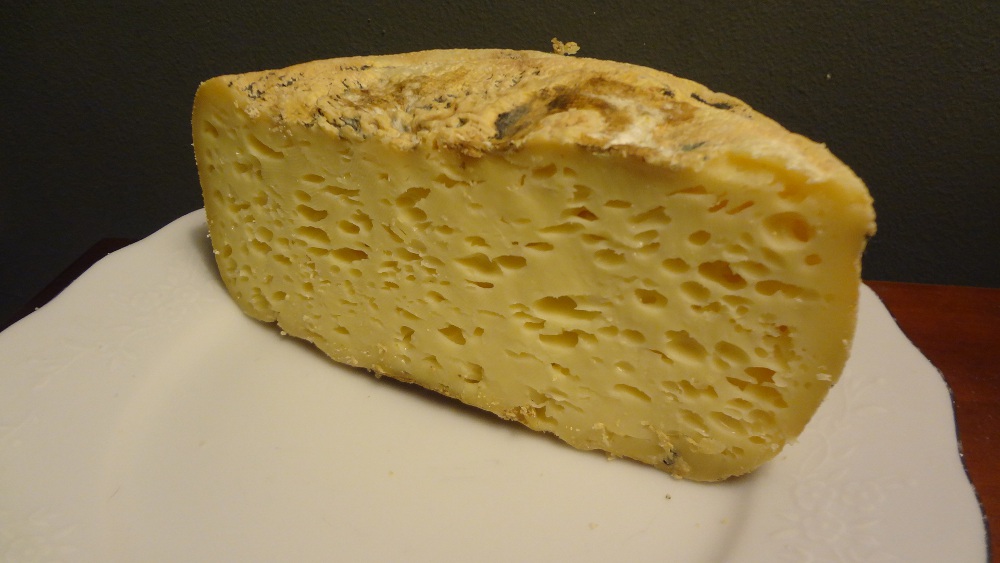
It is perfect! You can see how swollen it is. I am sure that the propionic bacteria did their job and made lovely holes inside.

And they did!

This cheese was perfect. The skin protects the inside so nothing happened there. I am more than a bit fascinated by that because the skin almost feels like leather!

Usually this type of cheese has to be very big to help the holes to grow. This was made of only 10 liters of milk so I was very happy with this holy cheese.

Unfortunately my success also caused the disappearance of the cheese. Sema was here and liked it a lot so she took it with her when she went to Turkey.

Anyway. It is a cheese that can be made relatively quick. Only 2 months before the next one is finished..

Hans

Posted in Peynir | Yorumlar Kapalı

The bottle filler

This is the best tool that any beer or wine maker can buy. Especially for beer makers.

I don’t like bottling. It is not much fun and it seems almost like work.

But this simple tool makes life a lot better. It is cheap, simple and works perfect.

When I started making wine I bought a bottle filler that was a bit more complicated. It would stop when the bottle is full. MOST of the time that is what it does. Unfortunately it would not work sometimes and you can guess what happens next. That’s right; precious wine on the floor.

On some bottles it would not fit properly which also resulted in spilling wine.

While making beer it was even more useless. It filled the bottles from the top and the beer splashes in which result in a lot of foam so it was not possible to fill the bottle in one try. It takes a long time to wait for the foam to disappear.

Then I found this thing.

It is hard to believe but this simple tool works fantastic. You attach it to the racking hose. When you push the filler to the bottom of the bottle it opens and the beer or wine will flow. When you lift it again the flow is immediately blocked.

Lift and it is closed

Place on the bottom and it is open

And the best part; it fills from the bottom of the bottle. This prevents foaming in beer bottles so you can fill them in one go. Filling bottles does not need to take longer than racking.

Since there is no splashing, the contact with air / oxygen is also minimized.

Seriously; no beer or wine maker should have to live without it.

I think that guy has made a nice movie about the bottling process.

Hans

Posted in Bira, Şarap | Yorumlar Kapalı

Emily

If you are old like me you immediately would think of this fantastic song by Hot chocolate. (It is actually called Emma but I don’t know any songs about her.)

Years ago I bought an Emily from Brouwland and I was pretty impressed by it. You can put a crown cap on beer bottles and you can also use it for champagne bottles for sparkling wine. I used to use the plastic corks for champagne bottles but I was not very happy with them because they would sometimes leak, removing most of the spark from sparkling.

To my surprise I learned that some people have the same problem with the crown caps placed with the Emily. I checked it with a friend who is a member of a Dutch beer forum and he confirmed that some members had similar problems. I was a little bit shocked because I was aware of a cheaper black model that was well known for not working so we decided to choose for the best model.

I do not use crown caps for beer making but flip top bottles and I did not make champagne for a long time and I realized that I had not used the caps before. Time for a test.

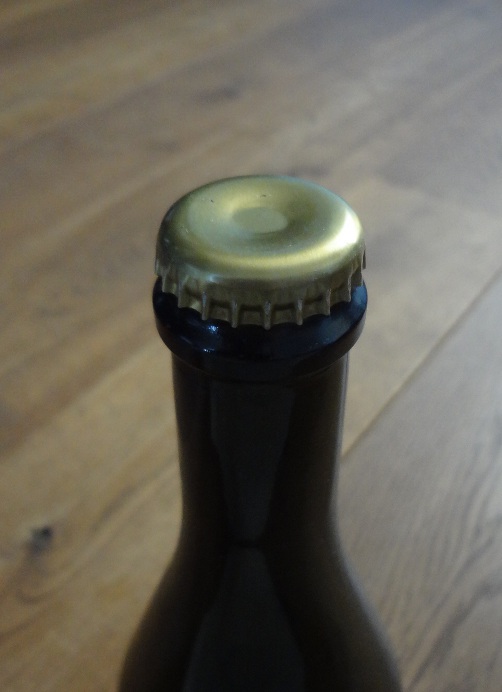
Yes. That does not look good. The cork has a big dent and probably the sides are pulled up so this could be leaking.

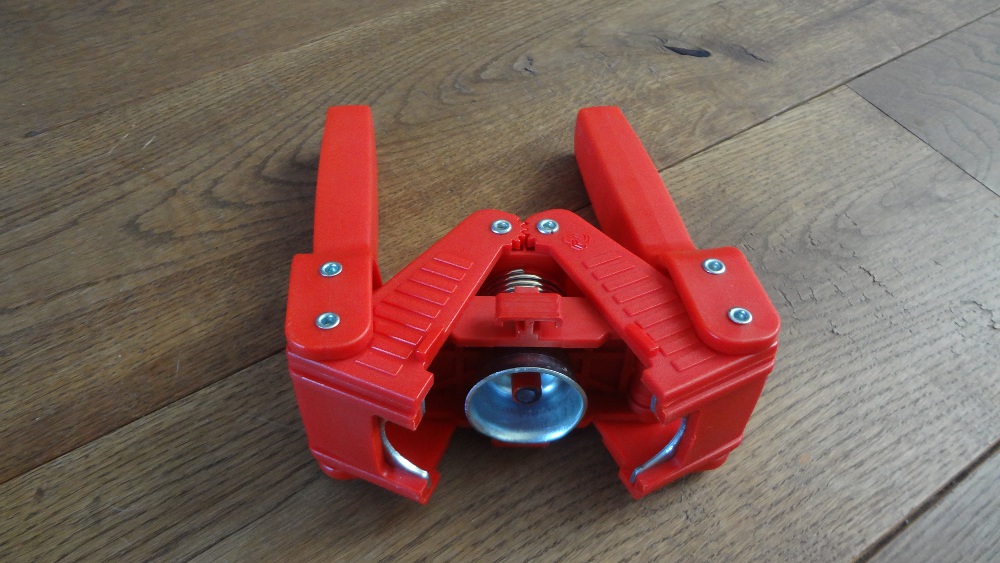
My friend explained to me that you can adjust this by unscrewing the metal dome in the middle that presses the cap. Unfortunately that did not work.

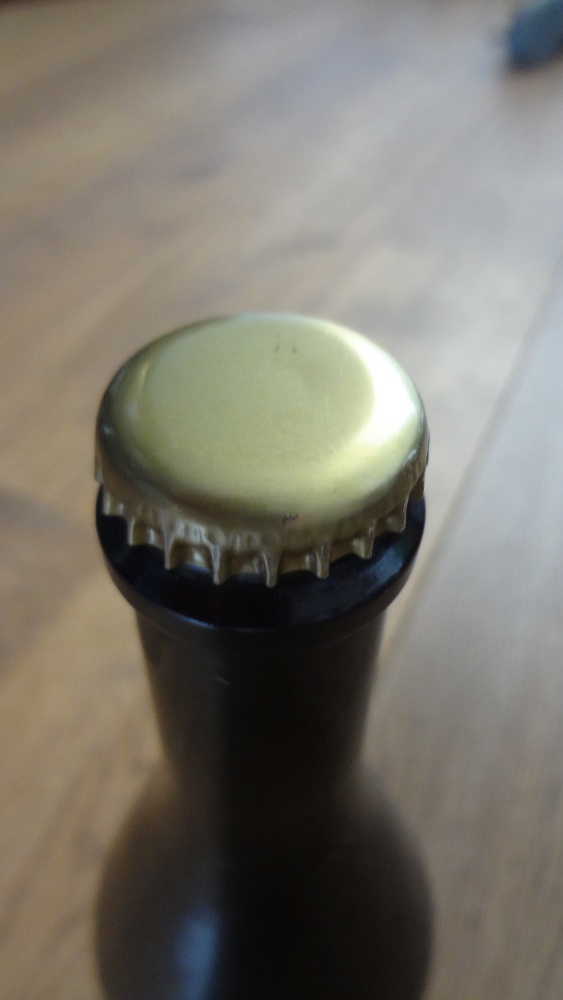
I tried to place another crown cap using less force. I removed the Emily and that looked a lot better. I placed the Emily again on the cap and pressed harder, and then very hard. I bent the handles to a point where I thought that I would break something. The cap still looked good. Barely a dent. I tried another cap and it looked good again. I tried it again and again. All of them look good. You can see that the cap is actually a little damaged from pressing very hard. But no dent!

BUT WHAT DID I DO?

At first I did not understand why the cap was dented. I thought it happened because I pressed too hard and the pin in the center dented the cap.

WHAT actually happened was this:

I pressed hard and the cap got stuck in the metal dome. When you try to open the capper, the red pin with the magnet in the center pushes down on the cap, making a dent.

So this problem was caused by me: I pushed too hard!

I wanted to know if more people had problems so I checked some reviews. Finding out in the process that Emily is also known as Red baron.

Most of the people give it a perfect score.

Which makes me happy because I don’t want to feel like we are selling bad products.

Some thing that can be read in the reviews is that not all bottle openings are suitable, so if there is a problem you may need a different type of bottle.

Hans

Posted in Bira, Şarap | Yorumlar Kapalı

Mead

Mead is an alcoholic drink made of honey. Let’s call it wine. The goal of this wine was to make a mead as it was in the beginning. Mead is also described as the drink of the gods. Nowadays mead is made in all kinds of ways. It can be a sweet desert wine, high in alcohol. It can be made as a champagne kind of wine, or it can made as a light, fresh white wine. I have been thinking a long time before I decided what I wanted to do with it. In ancient times the yeast would come from what was available in the air. Probably these yeasts would not produce more than 5% alcohol if you were very lucky. I am guessing that original mead from ancient times would be a very sweet drink with very little alcohol which also could not be kept a long time because it would be vulnerable for bacteria. Maybe it would become a sweet and sour drink.

This was not what I wanted. I decided that I would try to make a fresh wine with malic and citric acid and about 11% alcohol. A White wine for the summertime.

Here it is not possible to buy good quality honey. It is well known that honey from the supermarkets are part honey wth an added sugar solution. Unfortunately this is what you have to work with.

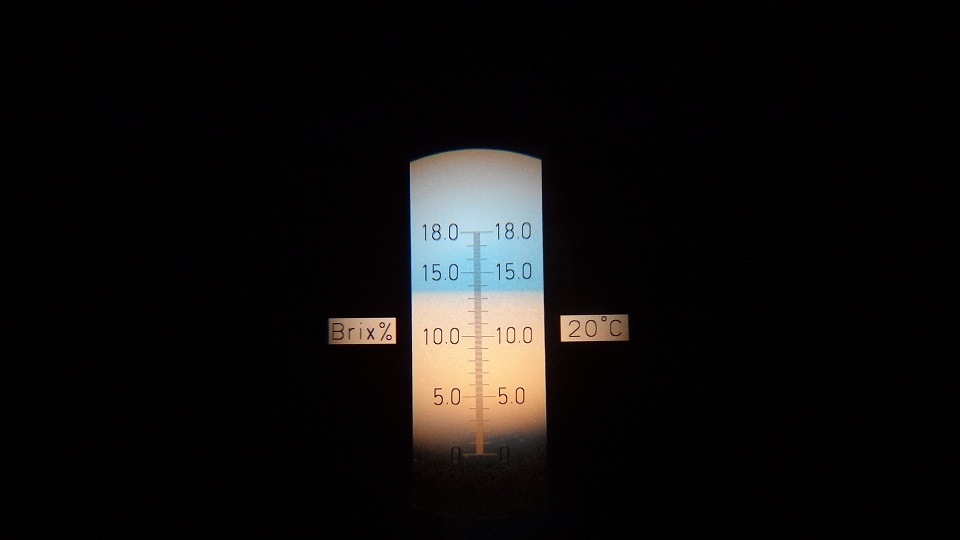
Anyway. First of all it is important to know how much sugar is in the honey. Obviously it is not possible to measure honey with the hydrometer. So I did the following.

  • Put 100 gram honey in a bowl.
  • Add water until it is total 1 liter
  • Stir.

From this solution you can make a measurement with the refractometer or the hydrometer.

My measurement told me that there was 72 grams of sugar in the solution. Meaning that 100 gram of honey contains 72 gram sugar.

From that same solution I measured how much acid was in the honey. It turned out very low. Less than 2 grams per 100 grams of honey.

  • I decided to make 20 liters of wine,
  • I put 6 kg of honey in a fermenter and added water until 20 liter.
  • I also added 40 grams of citric acid and 35 grams of malic acid. ( In case you don’t have malic acid you can use citric acid instead)
  • Just in case I added some yeast nutrition.
  • Stir with a long spoon so that everything is mixed properly and add normal White wine yeast. ( I had Bioferm Blanc so used that one.)

This is my basic recipe for mead.

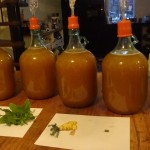
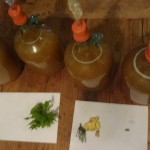
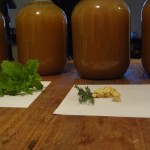
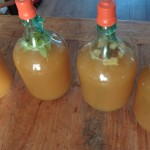
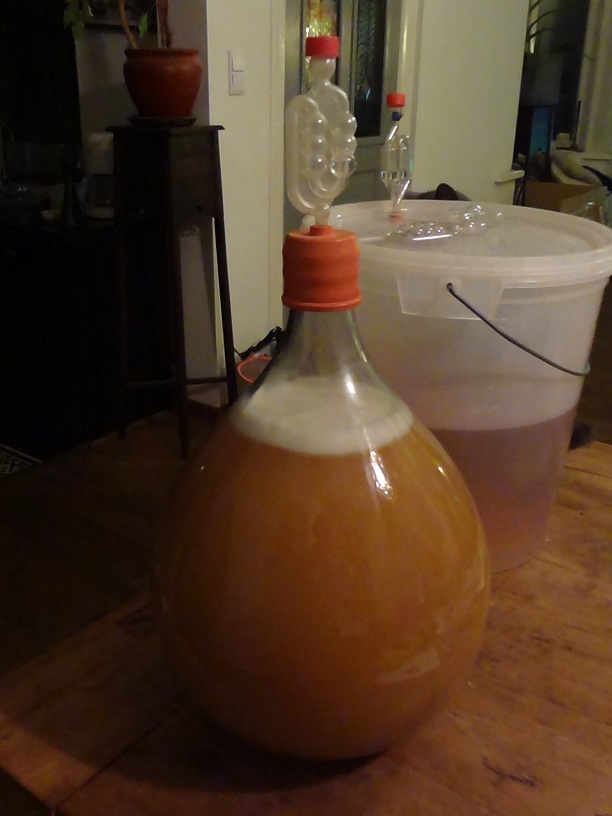
However I wanted to experiment with it so I decided to divide the 20 liter in four 5 liter demijohns after the first stage of fermentation.

In the first I did not add anything. Just pure mead as a reference.

In the second I added some mint. ( Fresh)

In the third I added ginger and thyme. ( Fresh and spicy)

In the fourth I added 1 single pellet of hop. ( Fresh and aromatic)

You can see the amounts in the Picture. It is not much because the base should be mead with a taste of the added ingredient.

Now it is just waiting for the result.

For probably about 8 months…..

Hans

Türkçe çevirisi:

BAL ŞARABI / MEAD / MEDE

İngilizce adı Mead olan ve baldan yapılan alkollü bir içecektir Bal Şarabı. Şarap literatüründe sadece üzümden elde edilenlere şarap adı verilse de gelin biz bu içeceğe de şarap diyelim ve özüyle tamlayalım: Bal şarabı. Hedefim ilk keşfedildiği zamanlardaki gibi bir bal şarabı yapmaktı. Eski çağlarda bal şarabı da tanrıların şarapları arasındaydı. Tanrılara lâyık, gözde bir içecekti. Günümüzde birçok formda ve tarifte bal şarabı üretiliyor:

  • Alkol oranı yüksek tatlı şarap türü olarak çıkabilir karşınıza,
  • Veya hafif ve şampanya/ köpüklü şarap formunda,
  • Ya da hafif ve sek bir beyaz şarap olarak.

İşe koyulmadan önce istediğim form üzerine uzun süre düşündüm. Antik çağlarda maya havada/florada/yaşanılan ortamda mevcut olandan gelirdi. Kuvvetle muhtemeldir ki bu vahşi mayalarla en fazla % 5 alkol oranlı bir içecek elde edilebilir idi, ki o da çok şanslıysanız.

Tahminimce antik çağa has orijinal bal şarabı az alkollü ve oldukça tatlı bir içecekti ki düşük alkollü , dolayısıyla bakterilere açık oluşu nedeniyle uzun süre muhafaza edilemiyordu. Belki tatlı ekşi bir içeceğe dönüşüyordu.

Yapmak istediğim bu değildi. Bal şarabımın hafif, serinletici bir tazelik ve ferahlık veren sek bir şarap olmasını istiyordum. Malik asit ve sitrik asitle bu ferahlık hissini yakalayarak % 11 alkol oranlı sek bir beyaz şarap formunda yapmaya karar verdim. Yaz akşamları için ideal bir içecek yani.

Buralarda ( şehir yaşantısında) iyi kalite bal bulmak zor. Herkes biliyor ki süpermarketlerde satılan balların hemen hemen hepsi normal şeker katkılı. Lakin elde olanı kullanmaktan başka çareniz yok.

Her neyse. Öncelikle elinizdeki balın şeker oranını hesaplayarak işe başlayabilirsiniz. Doğaldır ki balın özgül ağırlığını yoğun formu nedeniyle hidrometre aracılığıyla ölçmek mümkün değil. Bu nedenle şöyle bir işlem yaptım:

  • 100 gram balı bir kaba koydum,
  • 1 litreye ulaşana dek su ekleyerek balı seyrelttim
  • Ve iyice karıştırdım.

Elde ettiğiniz bu solüsyonun yoğunluğunu hidrometre veya refraktometre yardımıyla ölçebilirsiniz.

Elde ettiğim sonuç bana bu solüsyonda 72 gram şeker olduğunu söylüyordu. Yani elimdeki balın 100 gramında 72 gram şeker vardı.

Aynı solüsyonla elimdeki balda ne kadar asit olduğunu öğrenmek için asit testi de yaptım. Sonuç oldukça düşük çıktı : 100 gram balda 2 gramdan az asit bulunuyordu. Bu değerlere göre aşağıdaki reçeteyi hazırladım.

  • Hedefim 20 litre bal şarabı elde etmekti.
  • 6 kg balı fermentere koydum ve cetvel 20 litreye gelene dek su ekledim. 40 gram sitrik asit 35 gram da malik asit ekledim. ( Eğer elinizde malik asit yoksa yerine sitrik asit de kullanabilirsiniz.) N’olur n’olmaz diye bir miktar da maya besini ekledim. Mayayı eklemeden önce şıranın/şerbetin iyice karıştırdım. Tamamen homojenize olduğundan emin olduktan sonra beyaz şarap mayası ekledim. ( Elimde Bioferm Blanc vardı, onu kullandım.)

Bal şarabı için benim reçetem bu.

Temelde bal şarabı yapma hedefimin yanında bir kısmıyla da farklı aroma denemeleri yapmak istedim ve ilk fermantasyon sonrası 20 litreyi 4 adet 5’er litrelik damacanalara böldüm.

  • Birincisine hiçbir şey eklemedim. Sade bal şarabı olacak. Aynı zamanda diğerleri için de referansım.
  • İkincisine bir miktar taze nane ( Tazelik ve ferahlık için)
  • Üçüncüsüne zencefil ve kekik ( Tazelik ve baharatlı bir aroma için)
  • Dördüncüsüne ise bir pellet şerbetçiotu kattım ( Tazelik ve aromatik bir etki için)

Miktarları fotoğraflardan da görebilirsiniz. Çok fazla değiller. Yapmak istediğim ,eklenen malzemelerin tatlarını taşıyan bir bal şarabı zira.

Tüm işlemler sona erdi. Bundan sonrası sonucu beklemeye kalıyor.

Muhtemelen 8 ay kadar….

Hans “

Çeviren ve yorumlayan Sema Tanrıöver van Ameide

Posted in Şarap | Yorumlar Kapalı

pH

According to me beer making is not a very exact science for hobby brewers. It does not matter if you use a little too much malt or maybe even a different kind of hop. It will become beer.

So far I did not care at all about the pH of the water that I use. In the last beer that I brewed I decided to add some citric acid to the water as a test. To my surprise I ended up with a higher gravity than the previous time I made the same beer. Apparently the enzymes do work better at a lower pH.

Luckily a friend of mine has a very cheap pH meter that he bought from China so I borrowed it and did a test with it. According to a book I have, the enzymes work best at a pH between 5,2 and 5,6 so that was the target.

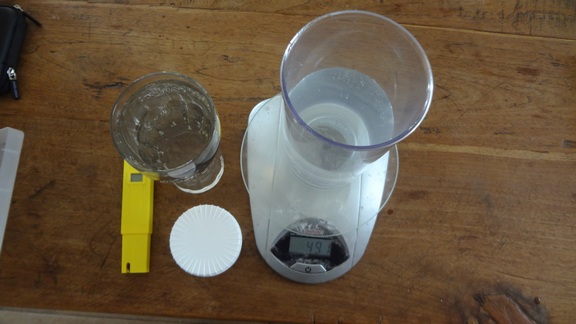
Testing equipment

The pH is not a linear scale so it is not so easy to predict the result. So I just tried to reach it.

Normally beer makers use lactic acid or other acids but since I don’t have it I decided to use citric acid which is a nice fresh tasting acid.

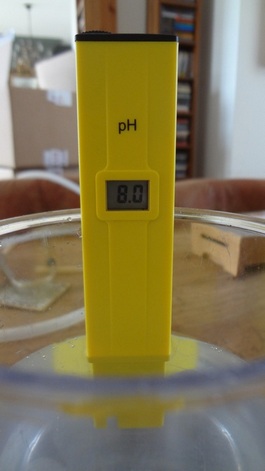
First I took a measurement of the water that I use without any additions. The pH is 8,0.

Normal water

Then I added 1 gram citric acid to 0,5 litre water. The pH went down to 2,8.

Obviously this was way too low so I diluted the solution by throwing away half of it and then add the same volume of water. The result was

1 gm in 1 litre -> pH 3,2

1 gm in 2 litre -> pH 3,8

1 gm in 4 litre -> pH 4,8

1 gm in 8 litre -> pH 6,1

Since my scale is not very accurate the above test is just an indication. I decided to use bigger quantities to be more accurate. I dissolved 10 gm citric acid in 500 mL water. Of this solution I used 5 mL. (Containing 0,1 gm acid)

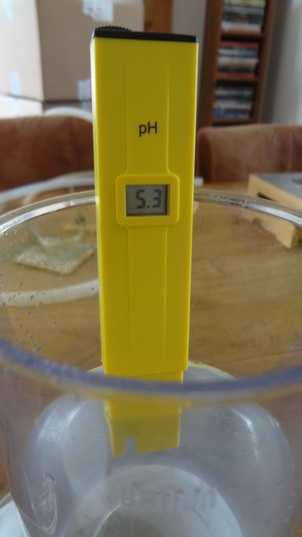
Then I dissolved this 5 mL (0,1 gm) in 500 mL water. The pH measured 5,3.

perfect!

So in conclusion; if you want to make 10 L beer you should add about 2 gm of citric acid. This is so little that obviously you are not going to taste this in the finished beer.

Calcium Chloride and pH
In this last beer I also used Calcium Chloride to soften the water. I am not able to do any measurements of the hardness so I used 2 gm per 15 L as per the recipe. (Actually I use 6 mL of the 30% CaCl solution which I use for cheese making)
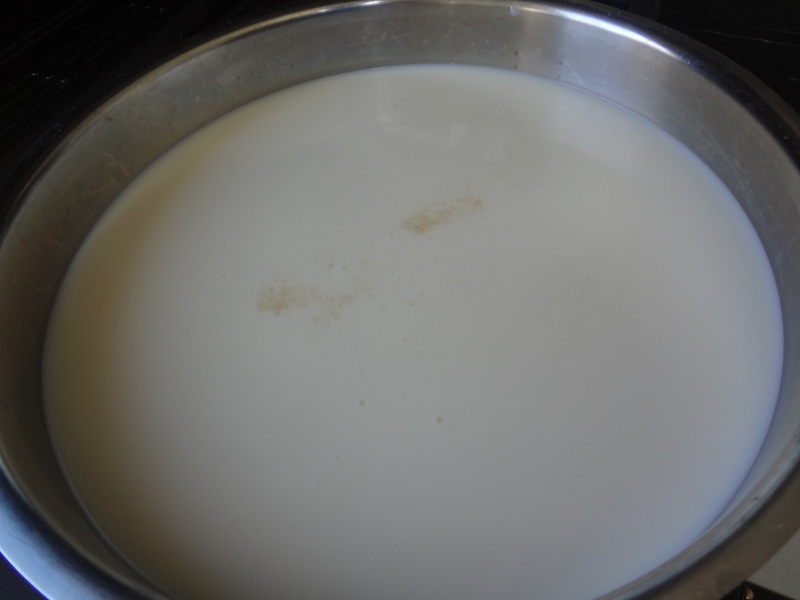
I read somewhere on the web that CaCl also decreases the pH so I decided to test that as well.

First I measured the CaCl solution as is. The pH is 5,9. Not very low, so I assumed that it would not be a great influence.

And I was right. I dissolved 30 ml (=10gm CaCl) in 1 litre water. The pH went from 8,0 to 7,6

Then I added another litre water. 10 gm CaCl in 2 litres of water. The pH went from 8,0 to 7,8.

It is safe to say that CaCl additions do not have influence on the pH compared to citric acid additions.

Hans

Posted in Bira, Şarap | Yorumlar Kapalı

Battle of the bugs

Making cheese, wine and beer have a lot in common. Basically what you do is :

  • Create an environment where the appropriate yeast or bacteria are happy.
  • Introduce them to this environment, avoiding unwanted guests.
  • Let them do the work.

By introducing yeast / bacteria you give them the chance to eat the nutrition before other bacteria have the chance to multiply.

Wine protects itself with acid and a high alcohol percentage.

Cheese protects itself with it’s acidity, some salt, and by forming a rind.

Beer protects itself with some acid, addition of hops, and some alcohol.

I have never had a problem with wine. It is very good in conserving itself.

Cheese can be a bit more of a “problem”.

Cheese can be made with different bacteria; B. Linens, P. Candidum, P. Roqueforti and Propionic bacteria.

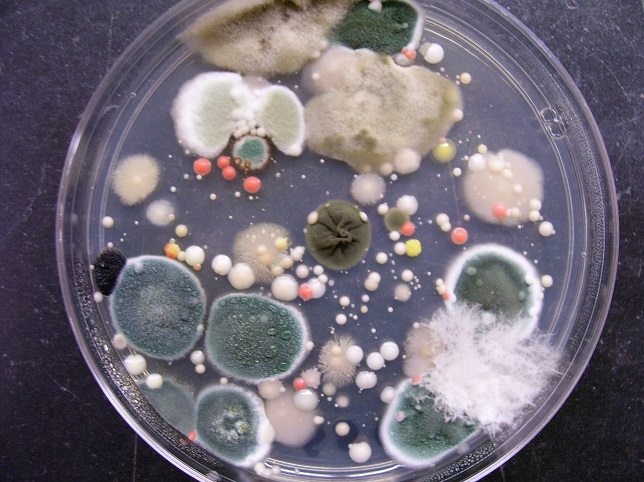
The first 3 create a rind that protects the inside of the cheese. (Other cheeses form a rind created with salt removing the moist.) When you have different types of cheeses in your cheese cave, you also have these different bacteria next to each other. This will surely cause some problems.

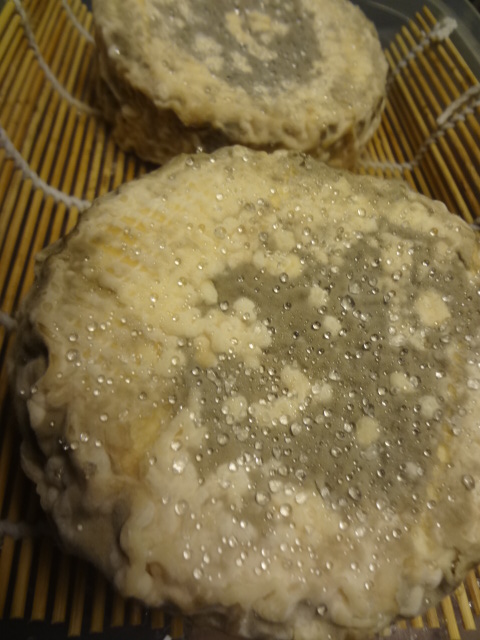
All these drops were formed where salt was applied at the cheese, dehydrating the rind.

If you have a blue cheese and a white cheese next to each other the white will attack and take over the blue cheese. The P. Candidum that I use is more powerful than the P. Roqueforti. The result is that the blue will slowly disappear and the cheese will become white unless you clean it regularly. (Please tell me how.) This does not mean that the cheese is a complete failure (On the contrary most of the time) but it will not be what you expected.

The B. Linens prefers very wet conditions. In these conditions the other bacteria are not so happy and they will not be able to take over this cheese. Vice versa, B. Linens will not be able to take over from P. Candidum or P. Roqueforti because the cheeses are too dry.

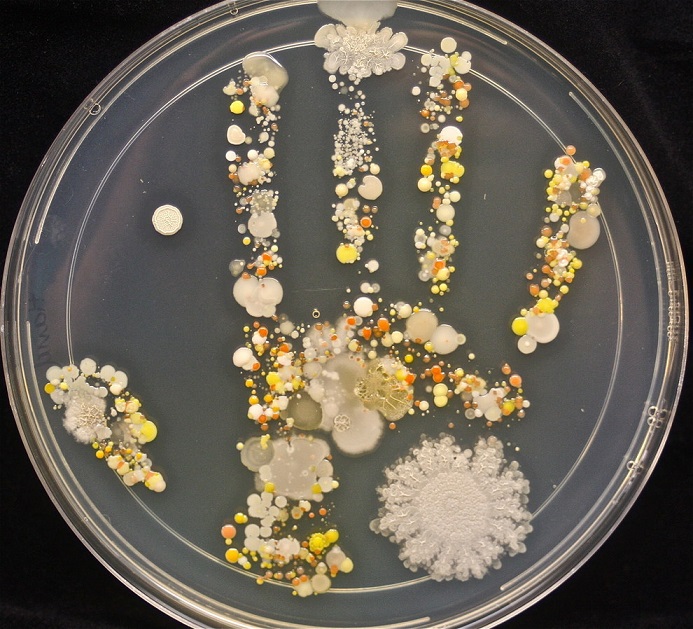
(Yes, a child’s hand in a petri dish.)

The point is that a lot of things are happening in your house which you are not aware of.

Until you DO become aware of it.

I made a white beer some time ago. When I tasted it, it didn’t taste the way it should. It was acidic and tasted like lime. Something was wrong! I didn’t dislike it because it became something between beer and sparkling white wine. Nice and fresh. No problem, I will drink it.

But what had happened? I found the solution in a good beer book. It mentioned the fault as described above and mentioned that this could be caused by the Lactobacillus bacteria.

The WHAT bacteria? Yes, exactly. The bacteria that is used to make cheese! (Also found in buttermilk if you would want to try to add this bacteria to your beer.)

Apparently beer can be a good place for Lactobacillus. As a matter of fact some beer styles use it to sour the beer.

In Lambic no yeast is added for the fermentation. The brewers rely completely on the yeasts and bacteria in the brewery to ferment the beer. Of course there is a risk that the “wrong” yeast will ferment the beer, possibly causing defects as off flavors, or stuck fermentations. However when you always ferment your beer in the same place with success you can be more or less sure that the yeast / bacteria that you are looking for is there ready to invade the new wort. I guess this may not be the case in the amateur brewers’ house.

I would not try this with a whole batch myself because I have good yeast available but maybe it would be a nice experiment with a few liter. I am sure that my house contains lot’s of cheese bacteria, wine yeast and beer yeast. That makes me feel confident that the result will not be dangerous to drink. Maybe even tasting good.

Anyway the message is: Be aware. Cheese WILL attack beer!

Hans

Posted in Bira, Peynir, Şarap | Yorumlar Kapalı

Weizen

One of the first beers I made successfully was Weizen.

I followed a recipe from a dutch beer making book that I really like. Unfortunately it is not available in other languages. There are only a few recipes in it but they are very detailed so you can check if your result is what it should be.

Many recipes will not tell the Starting SG or the alcohol percentage so you often have no idea if you extracted enough sugar from the malts.

Here is the recipe for 10 liters

Starting SG: 1.056 or 13,9 Plato

End SG: 1.011 or 2,8 Plato

Alcohol: 5,9 %

Fermentables:

EBC Amount (kg)

Pils 3 0,189

Wheat malt 3 1,215

Vienna malt 6 0,691

Mashing

Temperature 44 50 60 70 78

Time 10 15 25 25 5

Hops Alpha acids Time Amount

Hallertau tradition 5% 75min 9,2 gm

Boiling 90 min.

Yeast

Safbrew WB-06

Fermenting temperature

Primary fermentation 17

Secondary fermentation 20

Bottling sugar

9 gr/l

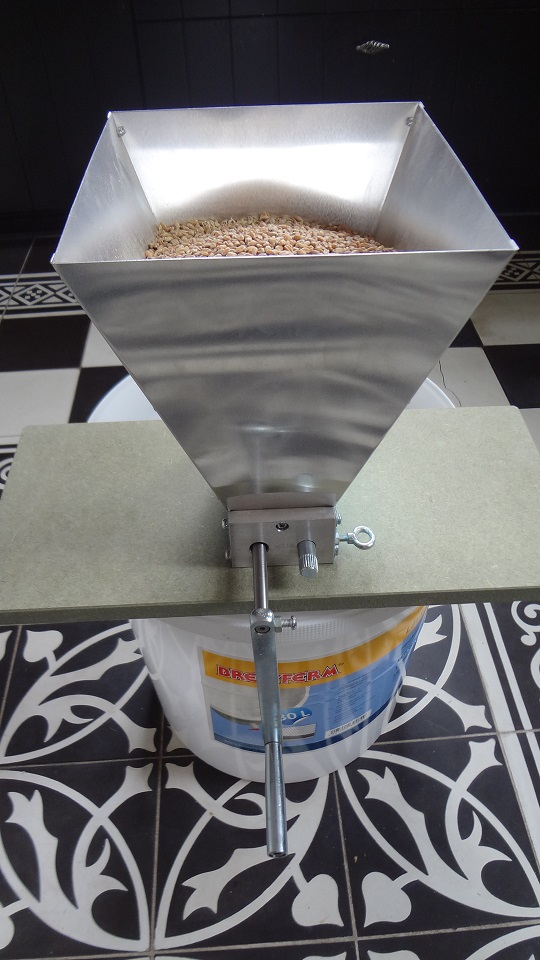
This is my grinder. It is expensive but it works great. I use the bucket for filtering to catch the malt. I really like this part of the job, especially for the lovely scent of the ground malt.

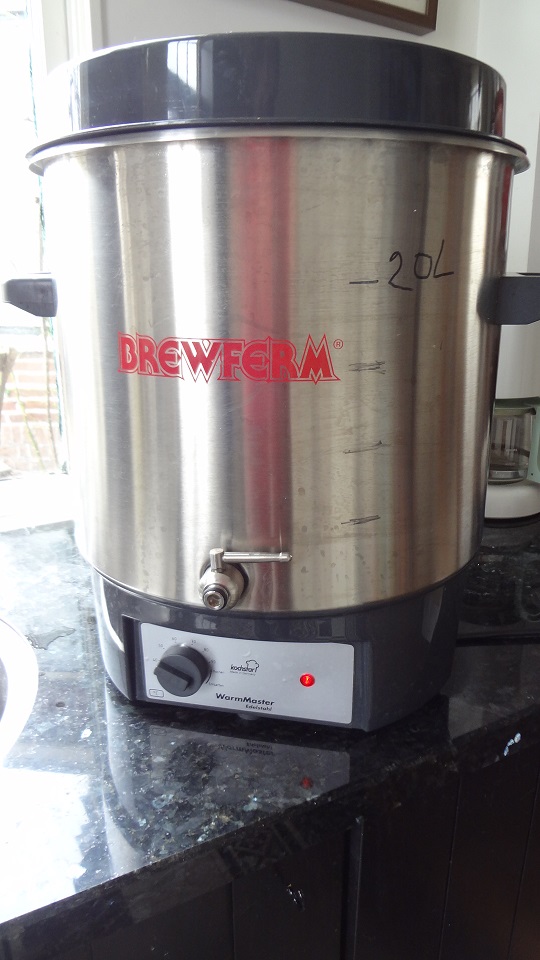
This is my cooker. At first I was not so happy with it because it did not work as I expected. Now I am happy with it but I am not sure if I would buy it again. I think that there are cheaper alternatives that work just as good.

Preheat the water to the starting temperature (a bit higher) before adding the malts.

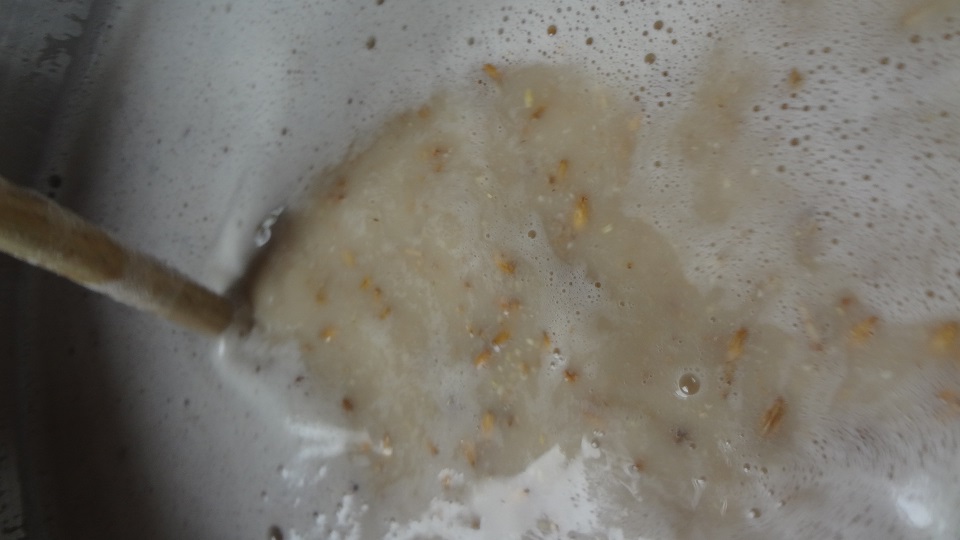
You can see the contribution that wheat malt has in the color of the wort.

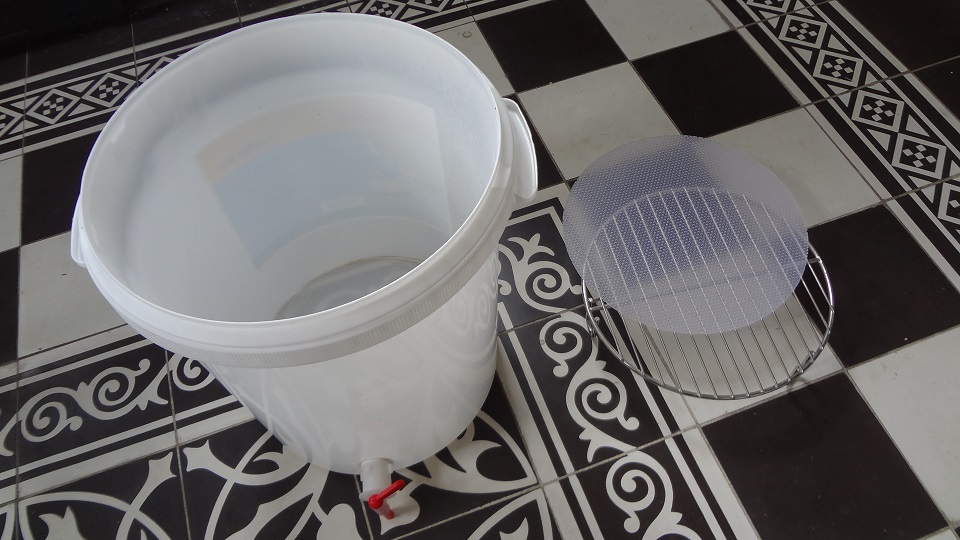
This is the bucket I use for filtering. There are other ways but I am very happy with this bucket. It is nothing special but it works really well.

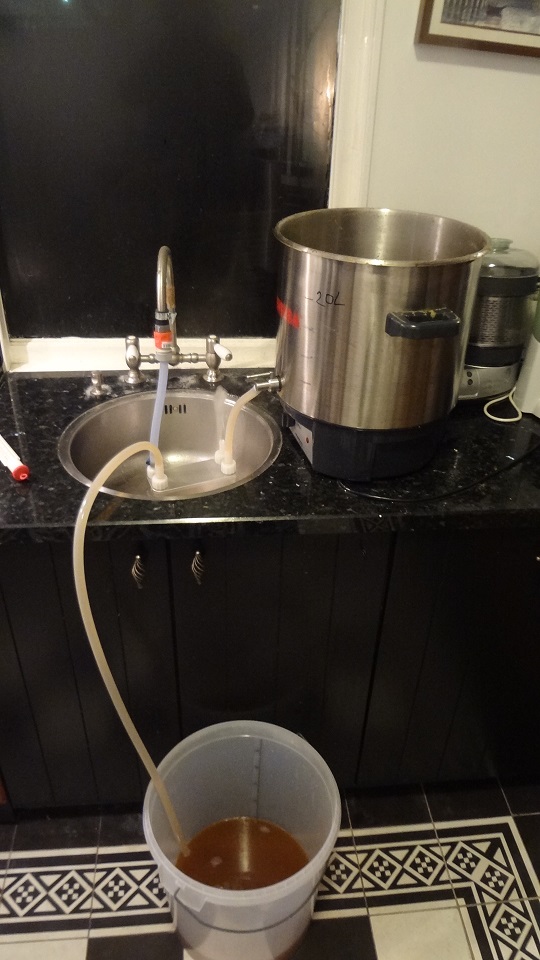
Here is the set up for the cooling. When I first started making beer I was in a hurry to cool the beer immediately after boiling. I made it a bit stressful. Now I am more relaxed and let the wort cool down a little bit so the leftover hops and other solids can settle on the bottom of the cooker.

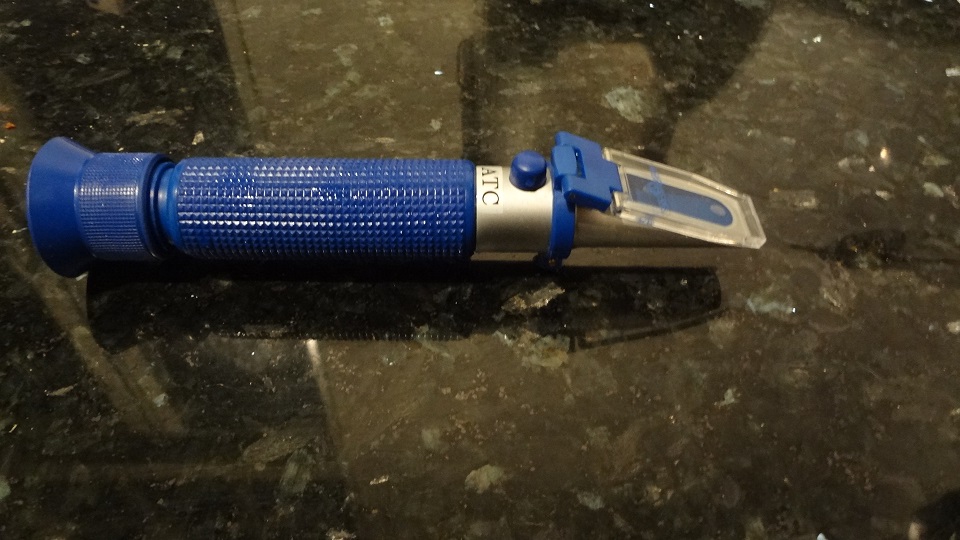
After the wort is cooled I make a measurement with the refractometer. I found that the S.G. was not enough so I had to add some sugar until it was about right.

After a few days I rack the fermenting wort into a glass demijohn. It introduces a bit oxygen again which is good for the yeast. In a later stage you want to avoid oxygen so I choose for a demijohn with little room for air above the beer. This step should not be really necessary because the beer is covered with a layer CO2 but I like to see what is happening and I think that the demijohn is a beautiful tool.

I have no control over the temperature at this time so it is room temperature. I am sure that beer will be the result.

Cheers

Hans

Posted in Bira | Yorumlar Kapalı

Fourme d’ Ambert

One of my favourite cheeses is Fourme d’ Ambert. I will write the recipe as it is in the book but in my own words and give some notes.

It is supposed to be a very high cheese. It is a blue creamy cheese. The taste is not very sharp.

Milk 16L

Mesophylic culture 2,5 mL

Penicillium roquefortii mold powder 0,65 mL

Calcium chloride 2,5 mL

Liquid rennet 2,5 mL

Cool 18% saturated brine

  1. Sterilize all equipment. Warm milk to 32 C.
  2. Sprinkle mesophylic culture and mold powder over the milk. Wait 5 minutes. Stir gently.
  3. Add calcium chloride to a cup with 50 mL of water. Add to milk and stir.
  4. Add rennet to a cup with 50 mL of water. Add to milk and stir. Keep at 32 C for 1 ½ hours.
  5. Check for a clean break. If there is no clean break, wait until there is. Cut the curd into 1,25 cm cubes. Wait for 5 minutes.
  6. Gently stir the curds for 1 hour at the same temperature.
  7. Remove the whey and ladle the curds in the prepared mold.
  8. Place the mold in the cheese press. Press at light pressure for 1 hour. Turn the cheese over and press for 6 or 7 hours.
  9. Remove the cheese from the
    press and place it in the brine solution for 12 hours, turning the cheese after 6 hours.
  10. Dry the cheese for 2 days at room temperature. Pierce the cheese with a knitting needle or a skewer.
  11. Place cheese in the ripening area at 10 C with humidity 90%. Turn cheese daily. Remove any whey from the container. After about 2 weeks a blue-grey moldy crust appears. Continue to ripen for 1 month. The cheese is ready and can be wrapped in foil and kept in the refrigerator for 2 to 3 months.

Notes:

  • I make the cheese with 10 litres of milk and adjust the other ingredients in proportion.
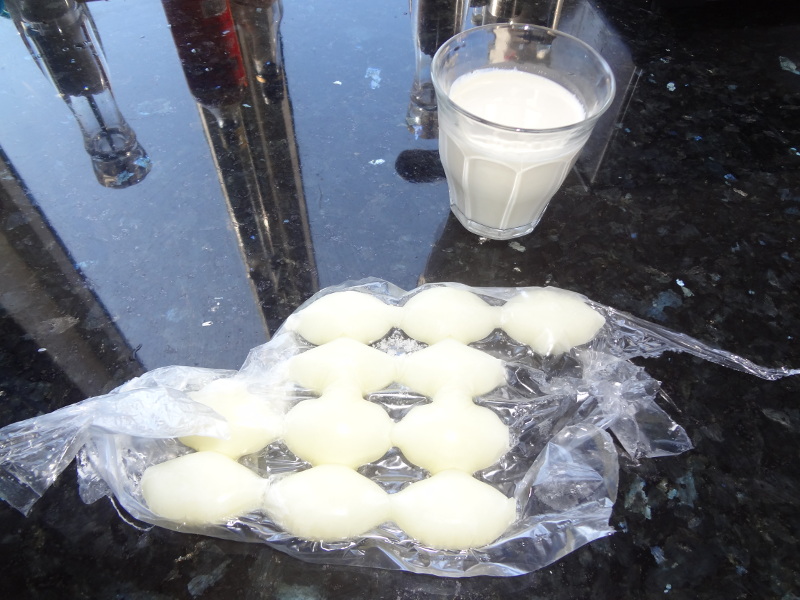
  • I have a mother culture of mesophylic culture which I keep as ice cubes in the freezer. A few hours before making cheese I put a cube in a cup of milk and let the bacteria defreeze and become active. For this cheese I use 115 mL of this starter for 10 L of milk.
  • Since the penicillium roquefortii is meant for a very big quantity of milk I use much less than the recipe prescribes.
  • It is a very high cheese. Too high to store in the box that I have. I keep it lying down.
  • I use raw milk so I don’t use calcium chloride.
  • I cut the curds a bit bigger. I believe that it makes the cheese a bit more creamy.
  • Before placing the curds in the mold I let them drain in cheese cloth because it will not fit in the mold.
  • You can adjust the amount of blue in the cheese by the amount of holes. More holes is more blue.
  • It is possible that the holes in the cheese close. The blue will not form inside the cheese. Make sure that the holes that you make are big enough.
  • I make the holes after the blue has formed on the outside. Don’t know if it makes a difference.
  • I use baking paper when storing the cheese in the refrigerator. When I start eating it I also use cling film to protect the opened side.

Bon appetit!

Hans

Just started ripening

Some blue appears

And some other guests

Pierced the cheese

Finished!

I love it!

Still good after 5 months

Posted in Peynir | Yorumlar Kapalı

My first camembert

Since it is only my 5th cheese I considered it a bit arrogant to try my luck on camembert. After reading lots of stories I considered myself expert enough to try it. Lack of proper equipment also cannot be an excuse not to go for it and see what happens…
Place a cube meso culture in a glass of milk so everything can wake up and leave them for a few hours.

Clean everything with sulphite and some citric acid. (A habit I have inherited from the wine making hobby.) Do not forget to clean hands.

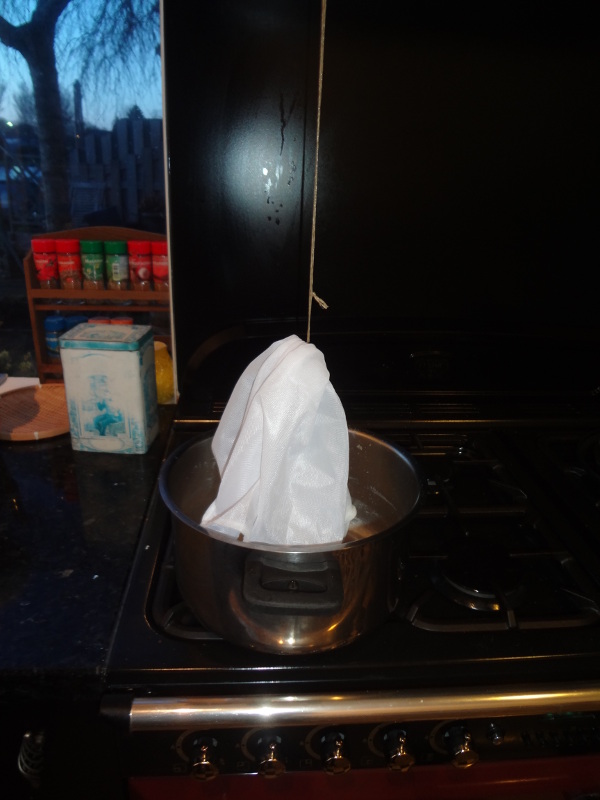
Warm up the milk (4L) and add the starter culture and a pinch of pencillium candidum.

Leave it and sort out how the molds should be placed.

Put 2 ml rennet in a small glass of water and add it to the milk.

Cut the curds and stir slowly for a while. I have no idea if this looks ok.

Let the curds drain in a cheese cloth for 15 minutes. Saw that somewhere on the internet and it seemed a good idea.

Place the curds in the molds and put the whey in a plastic bottle.

Don’t panic. Stay cool. Place the curds back in the pan and drill holes in the molds as fast as you can. (If you like you can do this step at a more convenient moment.)
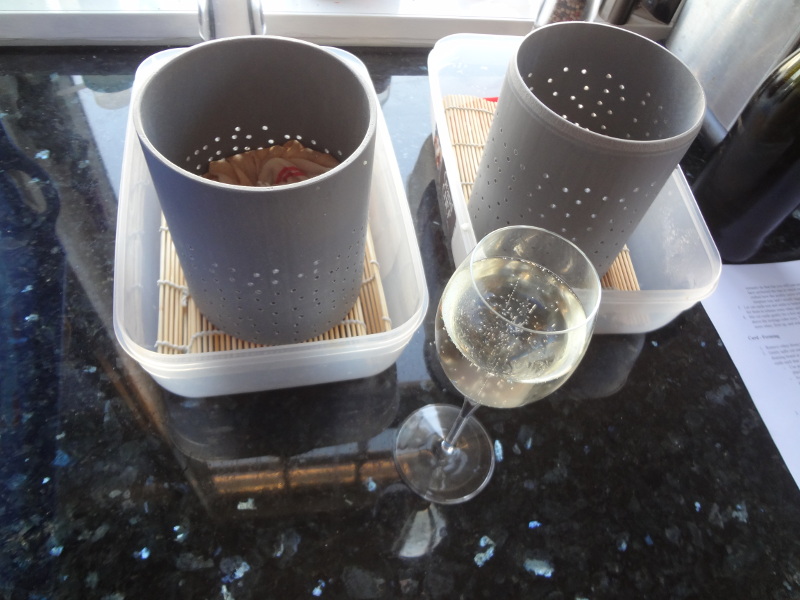
Open a bottle of champagne and have a glass to calm down.

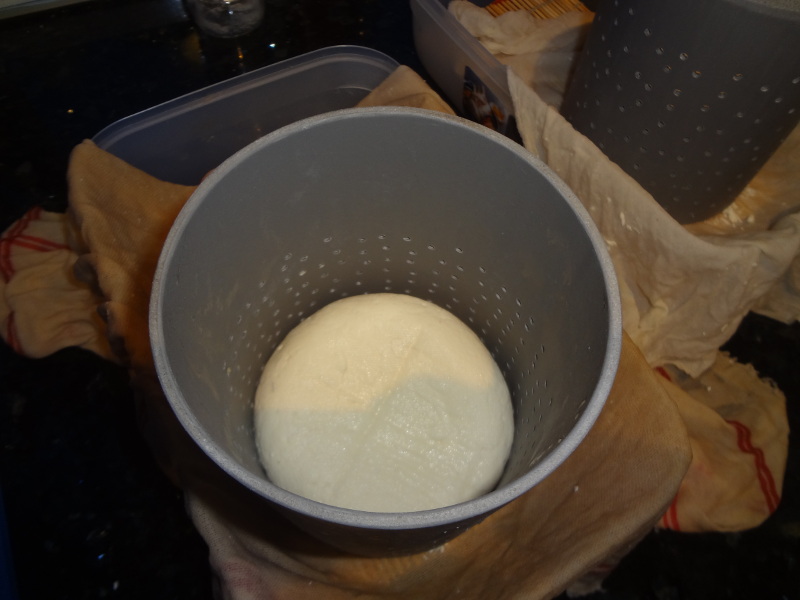
Place the curds in the molds. I think I prefer to use cheese cloth inside the molds to avoid curds coming out underneath.

I left them for 3 hours so the cheeses would be less fragile and easier to turn. Saw that somewhere on the internet and it seemed a good idea.

Add salt. The cheeses feel very fragile and wet and look as if Frankenstein made them.

After a few days the cheeses seem very spongy, still fragile and feel fatty and moist. Or should I say wet?

Another few days later the cheeses start smelling great, however after turning them my hands smell like feet.
They still seem a little wet so I dried them with a paper towel.
A few days later I think I see a tiny white hairy spot.

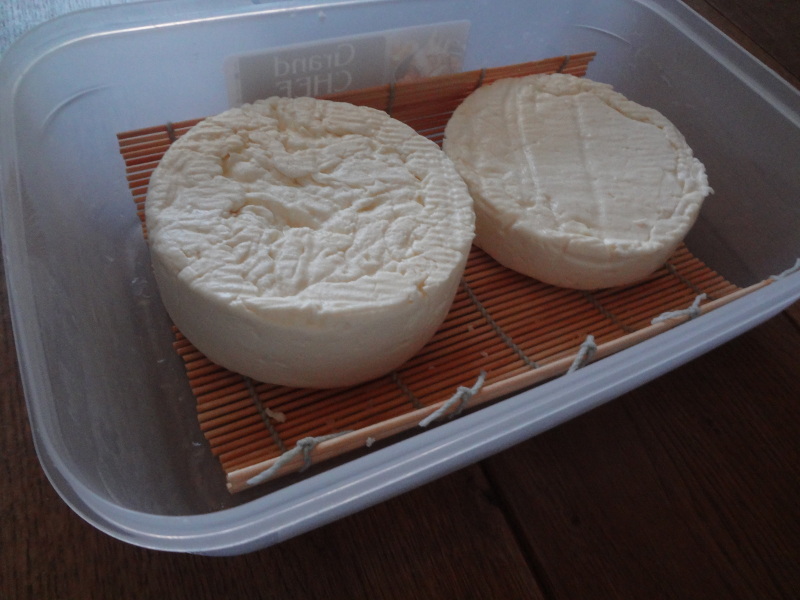
Which seems to be an accurate observation. The feet odour is not as strong as it was. The cheese is much firmer and drier. I add a few drops of water in the box to make it a bit more moist.

So far this has been very rewarding.
Hans

PS: A clip I liked

Put 2 ml rennet in a small glass of water and add it to the milk.
Leave it and think about the molds again.
Posted in Peynir | Yorumlar Kapalı